My New Setup
Over the new year, we moved house (because that isn’t a stressful enough time already), and I took the chance to upgrade some of my office setup, specifically my desk. Usually I just upgrade things as I need them, and a fair few things got upgraded last year anyway (computer, camera, mic), so this was a last big part to completely transform the space where I spend far too much of my time.
This is partially a chance to brag about my new desk and insist that I’m doing better at blogging this year, but also a chance to show what I’m using and how I did this. Most of this I posted on this Twitter thread, but this goes a bit more in-depth into my choices and why.
The Desk
When I first started looking at upgrading my desk, I reached out to the collective hive mind on the internet, looking for a standing desk that was available in Australia (the disadvantage of having so many international friends is I can’t get a bunch of things, or shipping costs more than my car), as well as being electric and having customisable presets available for heights.
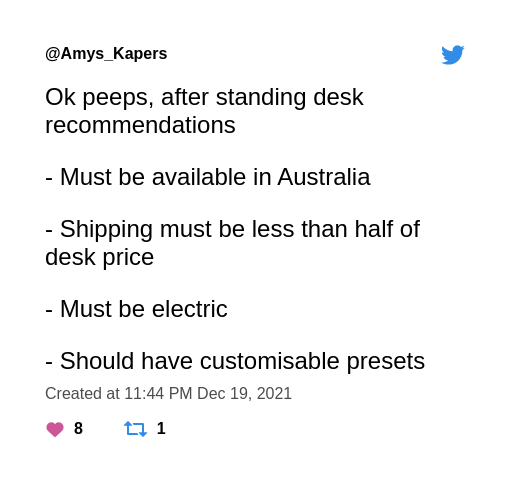
I got a heap of recommendations, with the top two suggestions being Zen Space Desks and Desky (both of which are actually based in Brisbane, Australia as well). Both were around the same price range, and for most of the features they were the same (you can see my full comparison here, prices and availability may have changed). Rather than just getting a desk I specifically looked at:
- Desk frame
- Desk top
- Under desk CPU mount (apparently this is the only time CPU is still used to refer to a computer)
- Under desk cable management
- Integrated power points
Eventually it came down to the fact that the Zen Space CPU mount was double the capacity of Desky (20kg v 10kg) and although I’m nowhere near close either, I wanted to future proof. Oh and Zen Space had an app (although I’ve since found out you need a bluetooth dongle which you have to contact them about). I also decided to just buy a frame which drastically reduced shipping costs, and allowed me to buy my own top and fit it to exactly the size I wanted.
- Stand Up Frame Kit to suit straight desktops - Zen Space Desks (in black)
- Integrated Cable Management Channel - Zen Space Desks (with 8 ports and ethernet)
- Universal CPU Mount - Zen Space Desks (with mounting brackets)
- Sit/Stand Desk Castors | Products | Zen Space Desks
- Anti Fatigue Sit Stand Mat - Zen Space Desks
The Desk Top
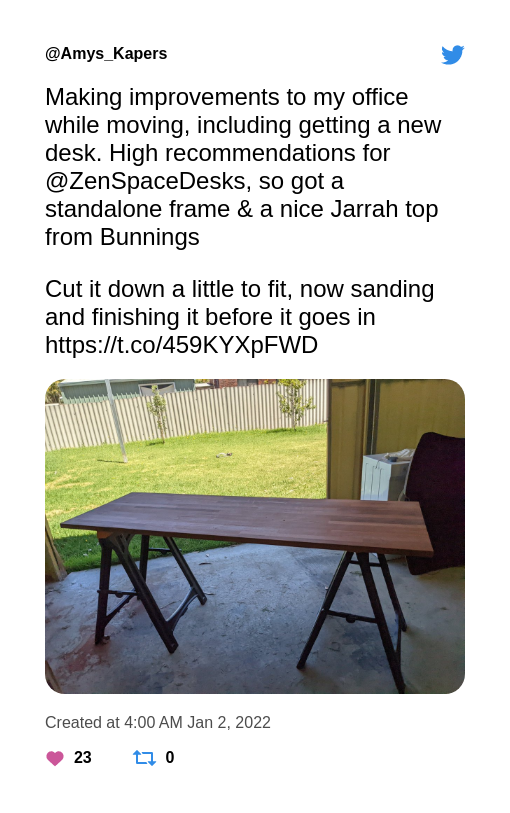
Because I just bought a frame, I then went to Bunnings to track down a piece of wood to put on top. I did look at a few local places that did solid timber slabs, but given all the upgrades I’d bought, I needed to pare back the fanciness of the top a little.
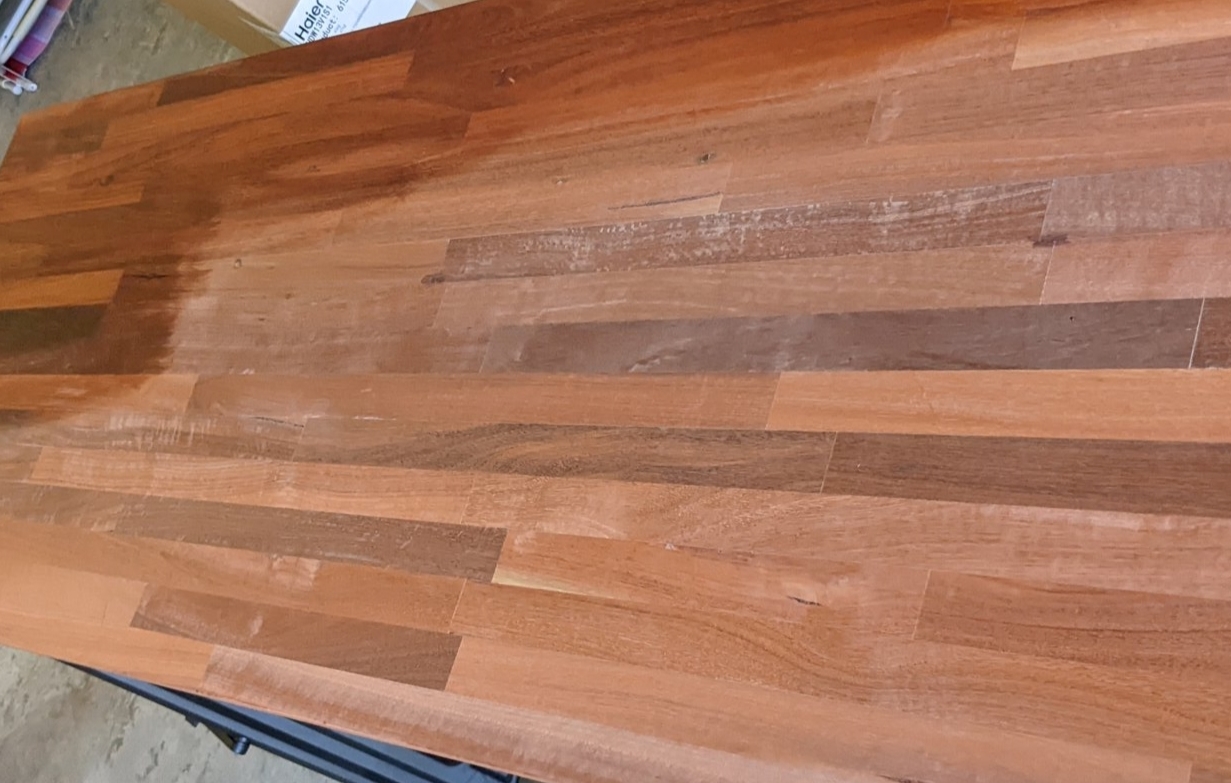
My existing desk was 1.2m 75cm , so at the very least I wanted it to be that big, ideally bigger. The space allowed for about that deep, and 2m wide, and I managed to find a nice piece of Acacia that was 2.2m 60cm which would work nicely (although wood need the end cut off). However when I went to buy the top, I found an identical sized jarrah top for not much more, so impulsively splurged on a nicer top (and glad I did as those tops are no longer available).
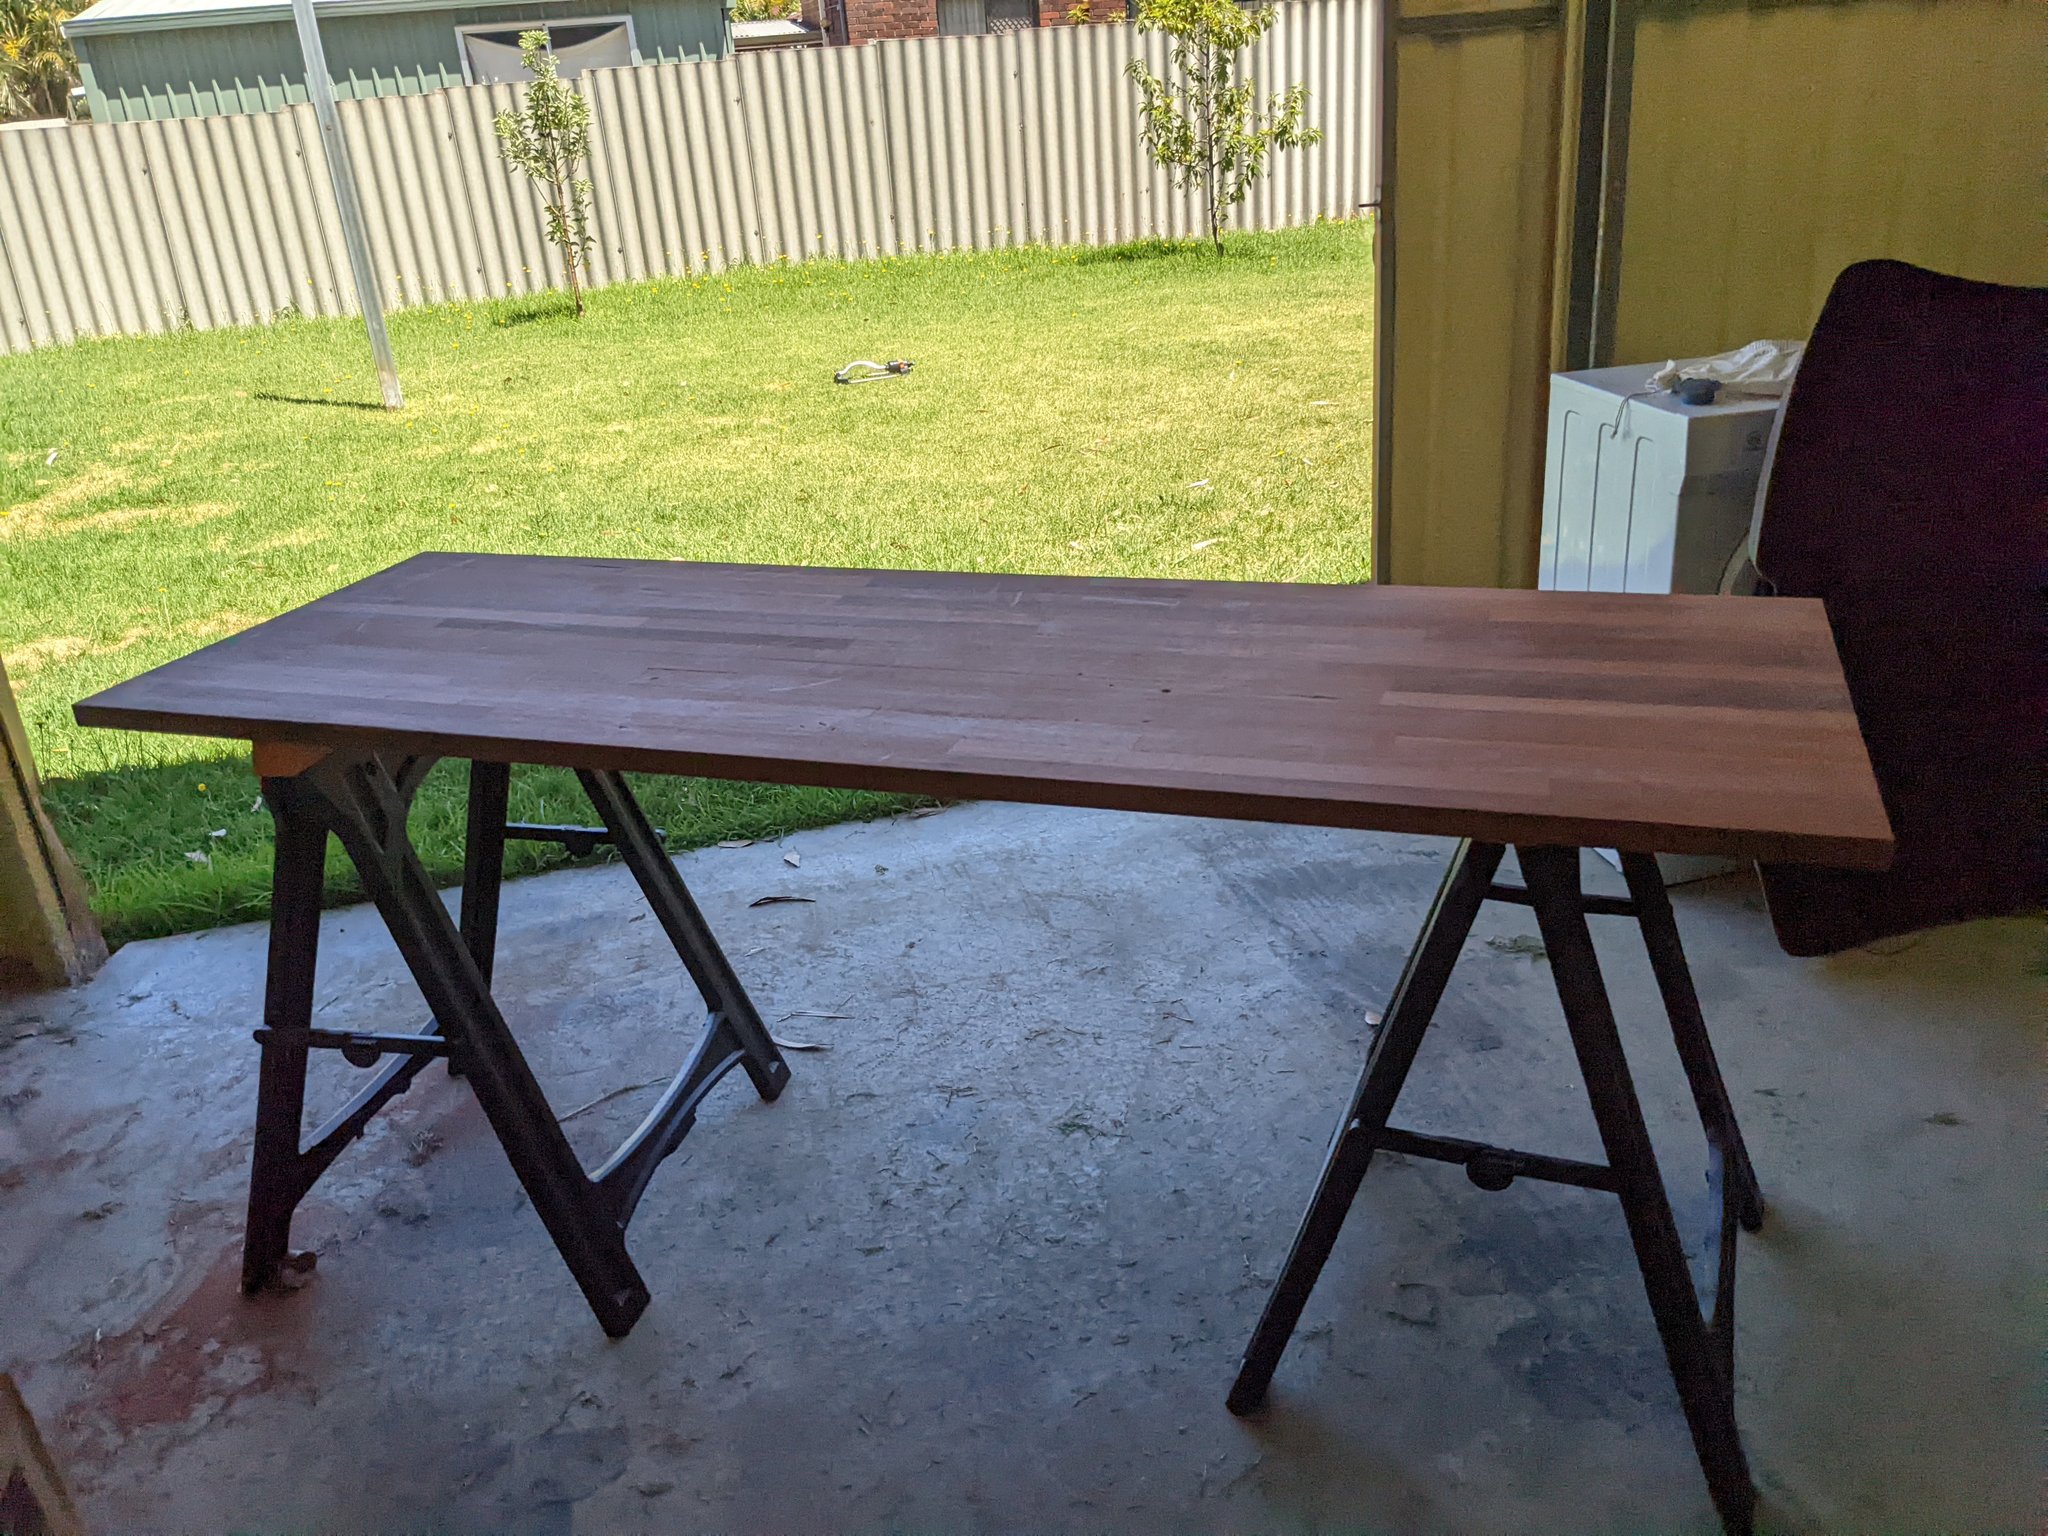
I cut off the end so it’s sitting at around 1.8m long, (and managed to get a solid grazing platter out of the end), and it ended up being the perfect size as the extra width is far more useful than any additional depth. To finish it up, I gave it a light coat of tung oil, which will protect the wood and allow for much easier upkeep along with giving it an amazing natural colour.
While the desk dried, I assembled the frame, and then drilled holes in the top to attach the frame. I was a little nervous about the safety of my computer mounted underneath, but as soon as I started drilling holes into the jarrah I decided it would hold it.
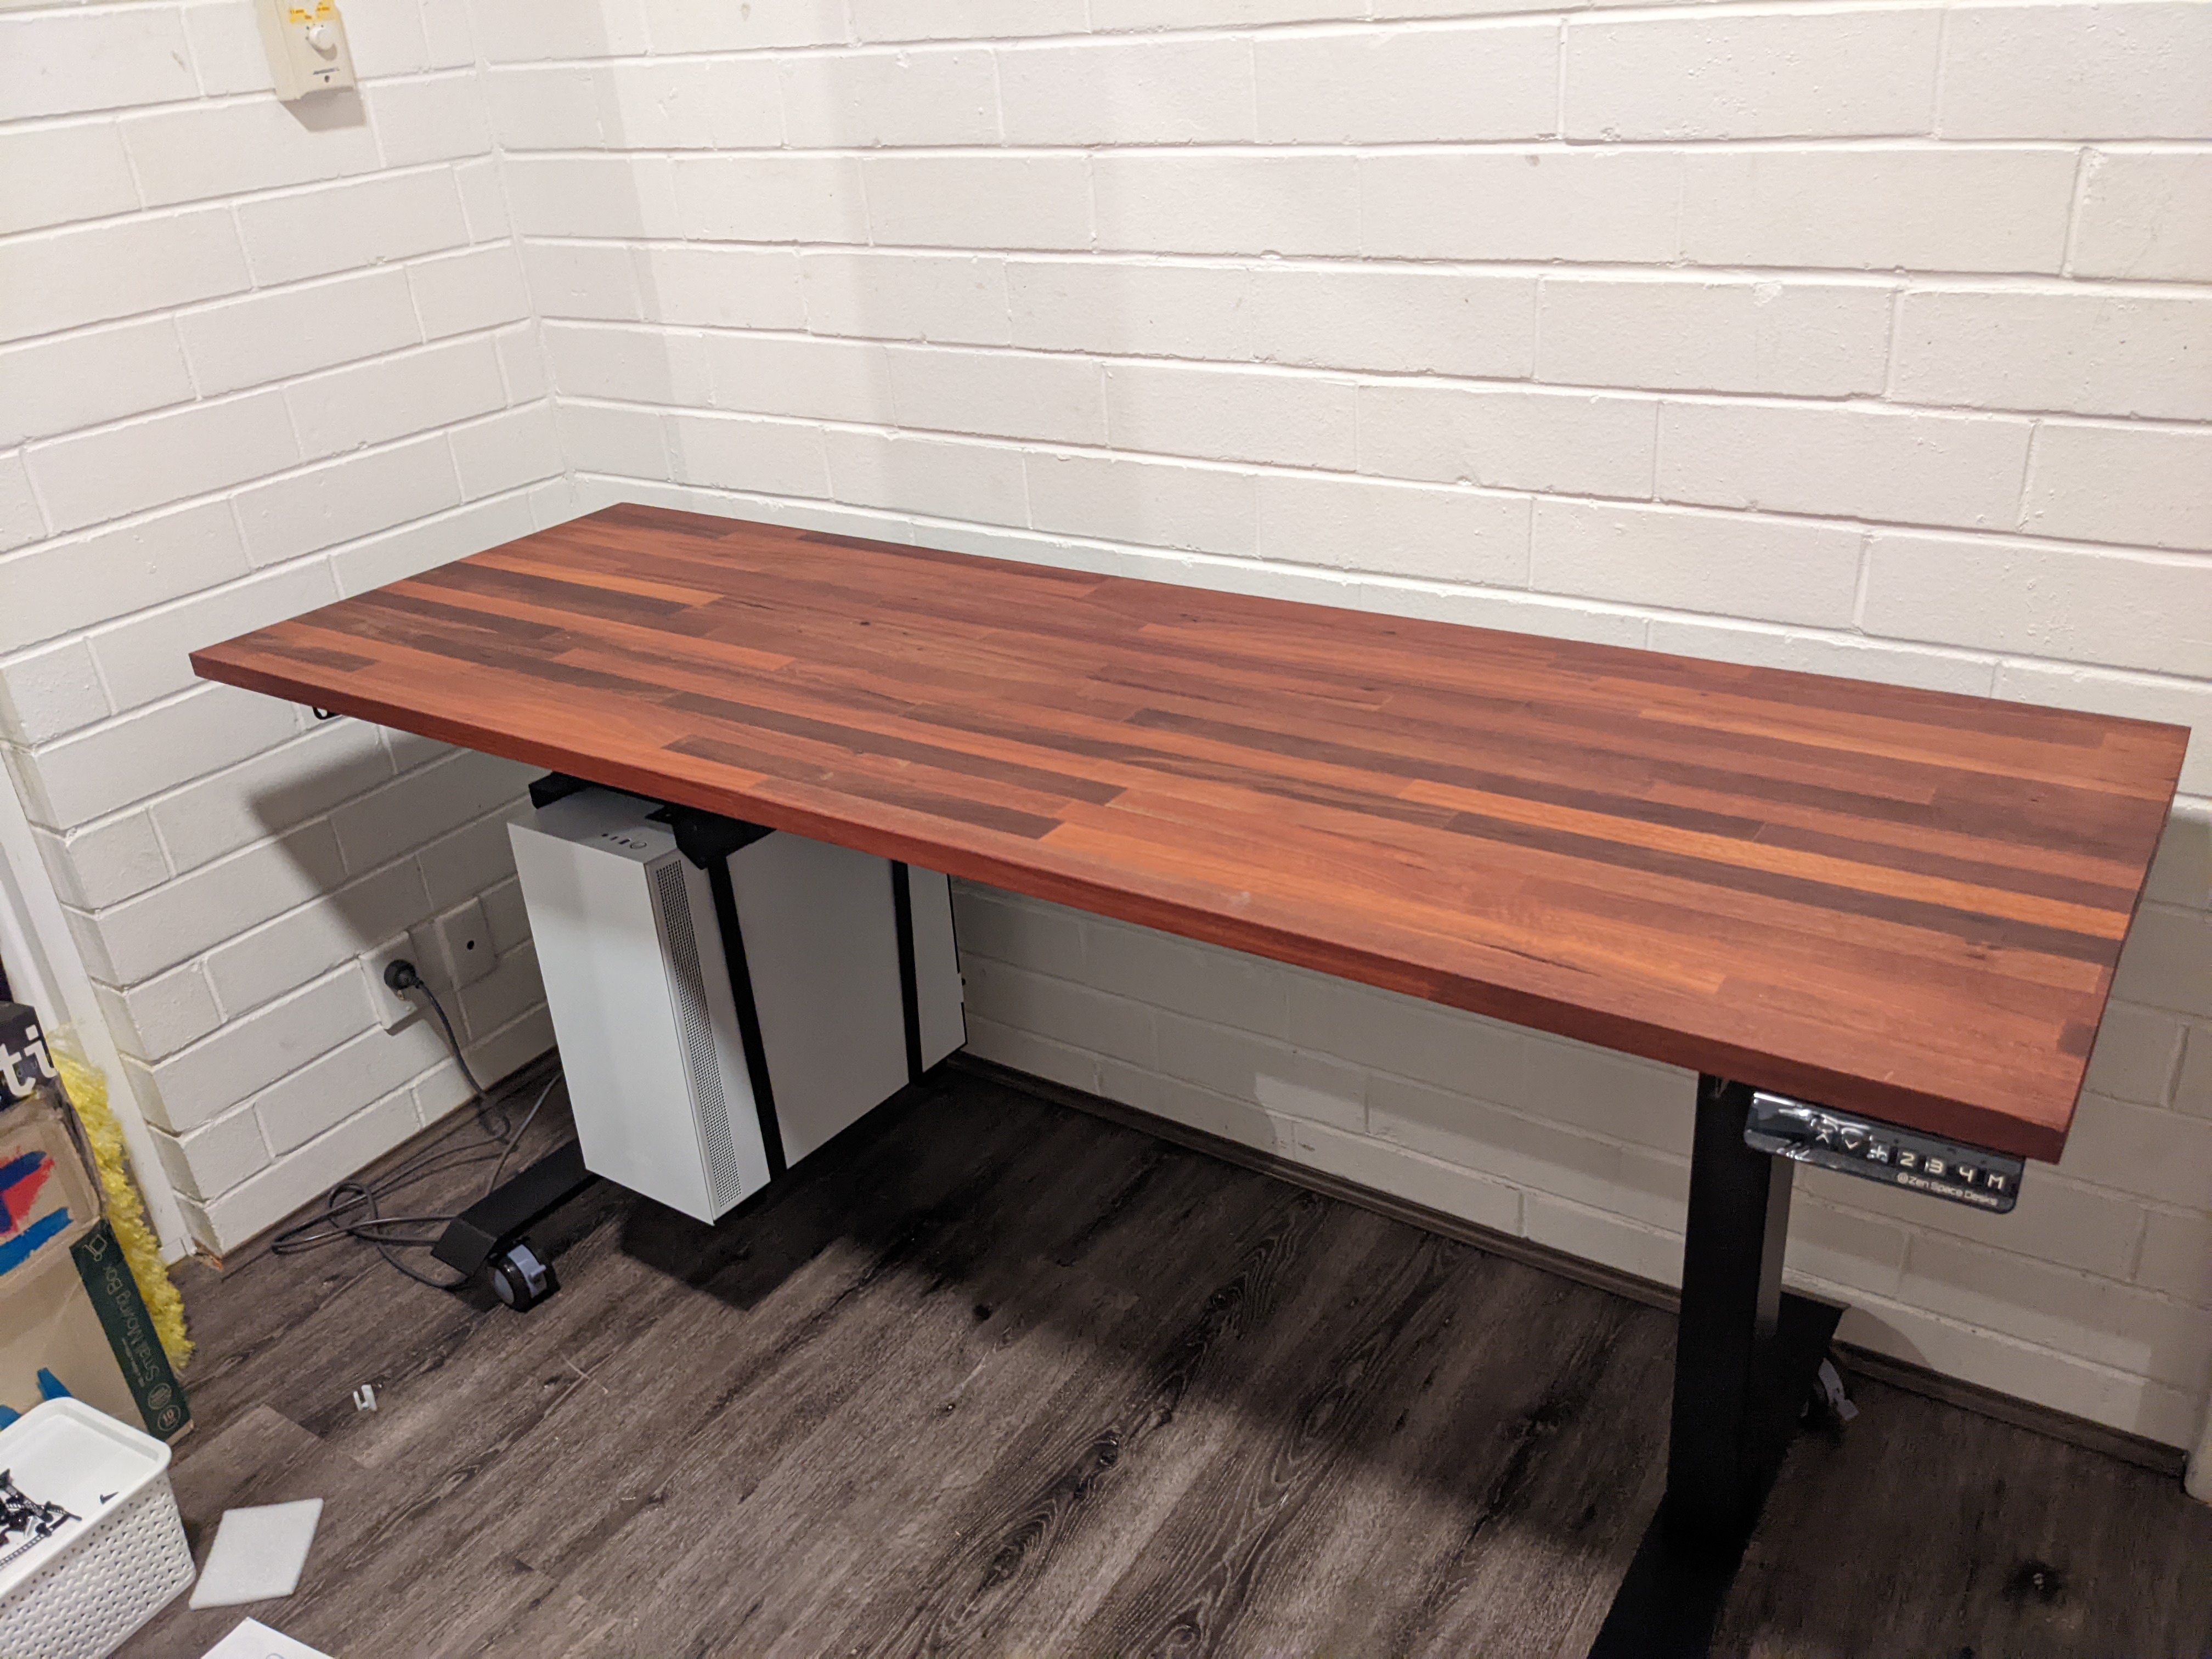
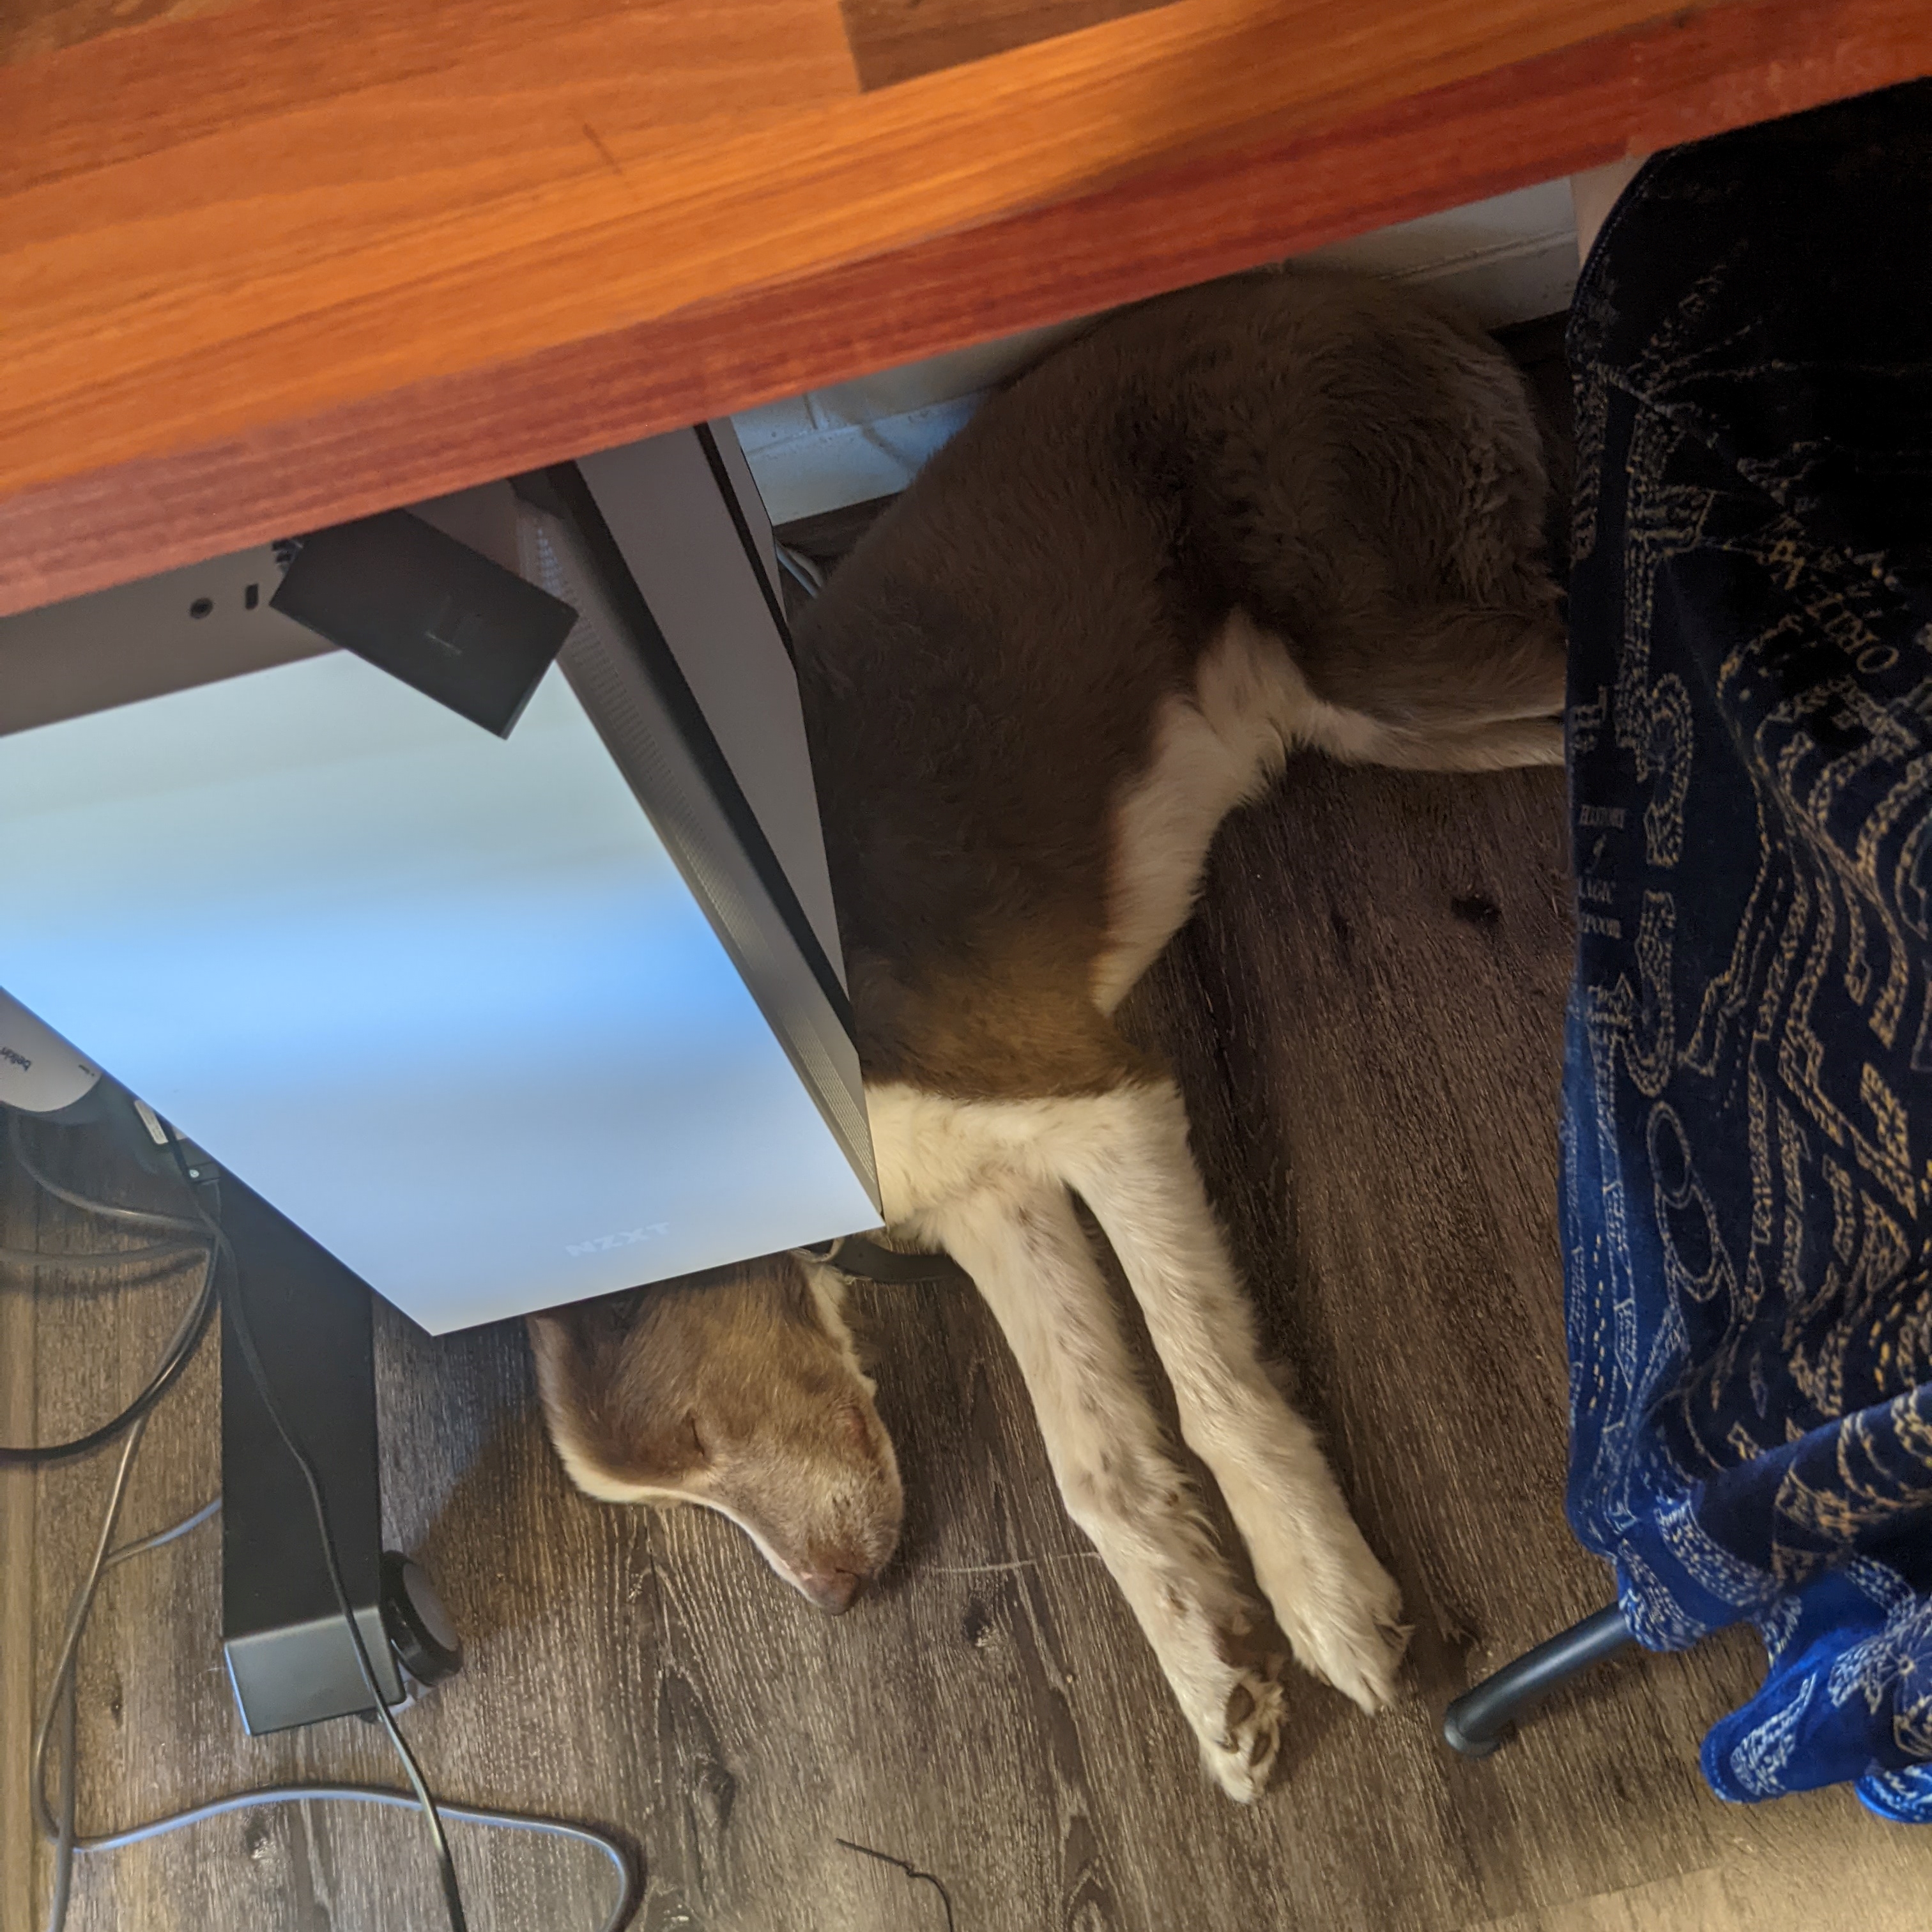
I had been a little worried about being able to access the USB ports on the top of the computer, but thankfully the brackets to mount it to the frame (rather than directly to the underside of the desk top) gave the extra space needed to easily plug things in. The extra length of the desk also means I’m not continually knocking it, although my dog does like to lie underneath it, and regularly bumps it 🙄.
The Lights
I’ve known that I can’t be a real developer if I don’t have LED lighting on my desk, so I got some LIFX Lightstrips to go along the back of the desk. Although there are a heap of options out there, we’re moving towards LIFX as the only smart lights in the house (to standardise) and these also have different light zones so I can easily program different colours (and animate them). The added bonus of the Home Assistant compatibility also means that I can control them there when I get around to setting that up as well, and perhaps program it depending on if I’m in a meeting.
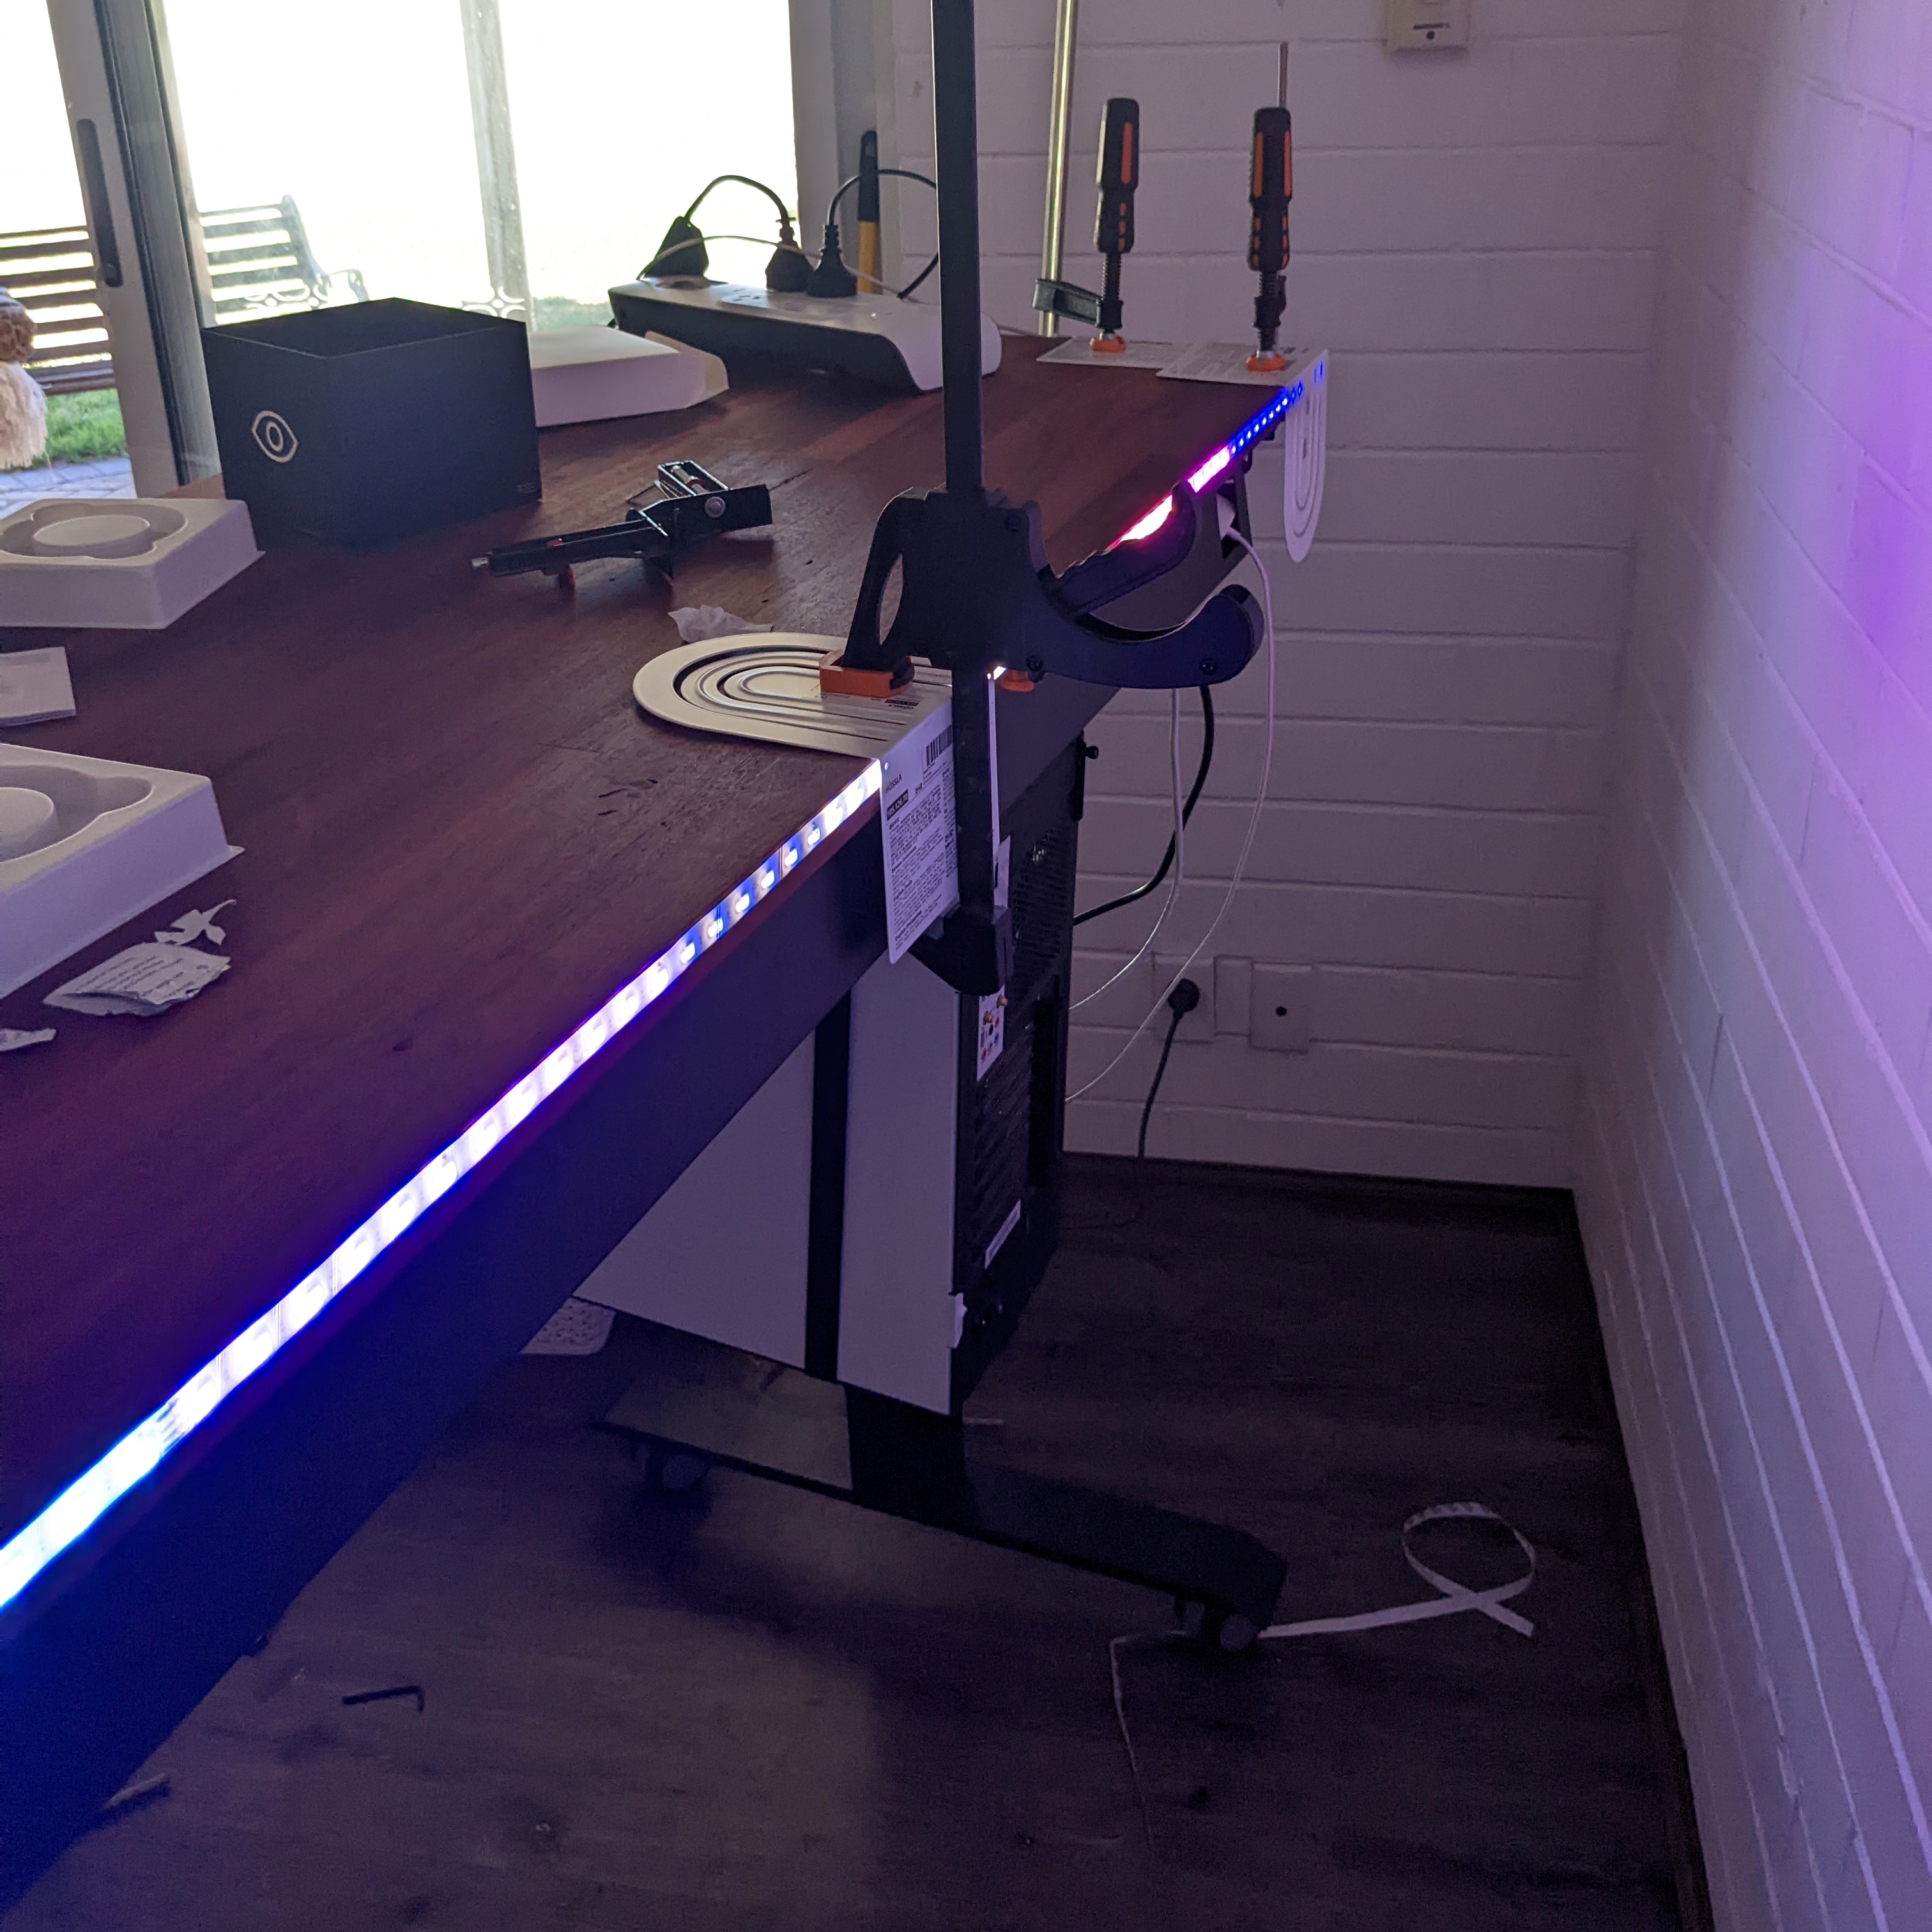
We unfortunately hit a snag when attaching them where the sticky strips didn’t want to attach to the oiled wood, but thankfully we were able to clamp and hold them in place long enough to stick and added some additional adhesive at a few key points that needed a bit extra (like the ends and around the corners).
The Power
Although I’d gotten 8 power plugs to go with the integrated cabling under the desk, it wasn’t quite enough to plug everything in, thankfully someone pointed out that the plugs that Zen Space includes with their desks are fairly standard, and you can purchase additional ones to add on. This ultimately led to the discovery of a store in Perth (4Cabling) that would be any network nerd’s dream, and I walked away with:
- Elsafe Quad Power Outlet and Elsafe Dual Power Outlet (and extensions, for an additional 6 points)
- Elsafe Quad Data Outlet (plus the inserts required, and shorter network cables)
- TP-Link Switch (I only had one port, so this gave me the ability to plug in 4 devices)
The Setup
This was also where I hit another snag, because the desk wasn’t as deep, the cable management channel was pretty much flush with the back of the desk and I wasn’t able to attach my monitor arm. So I got most of it set up, while I worked on fix, thankfully the offcut from the desk (which hadn’t yet been turned into a grazing platter) was a perfect match to stand my monitors on until I could get an arm.
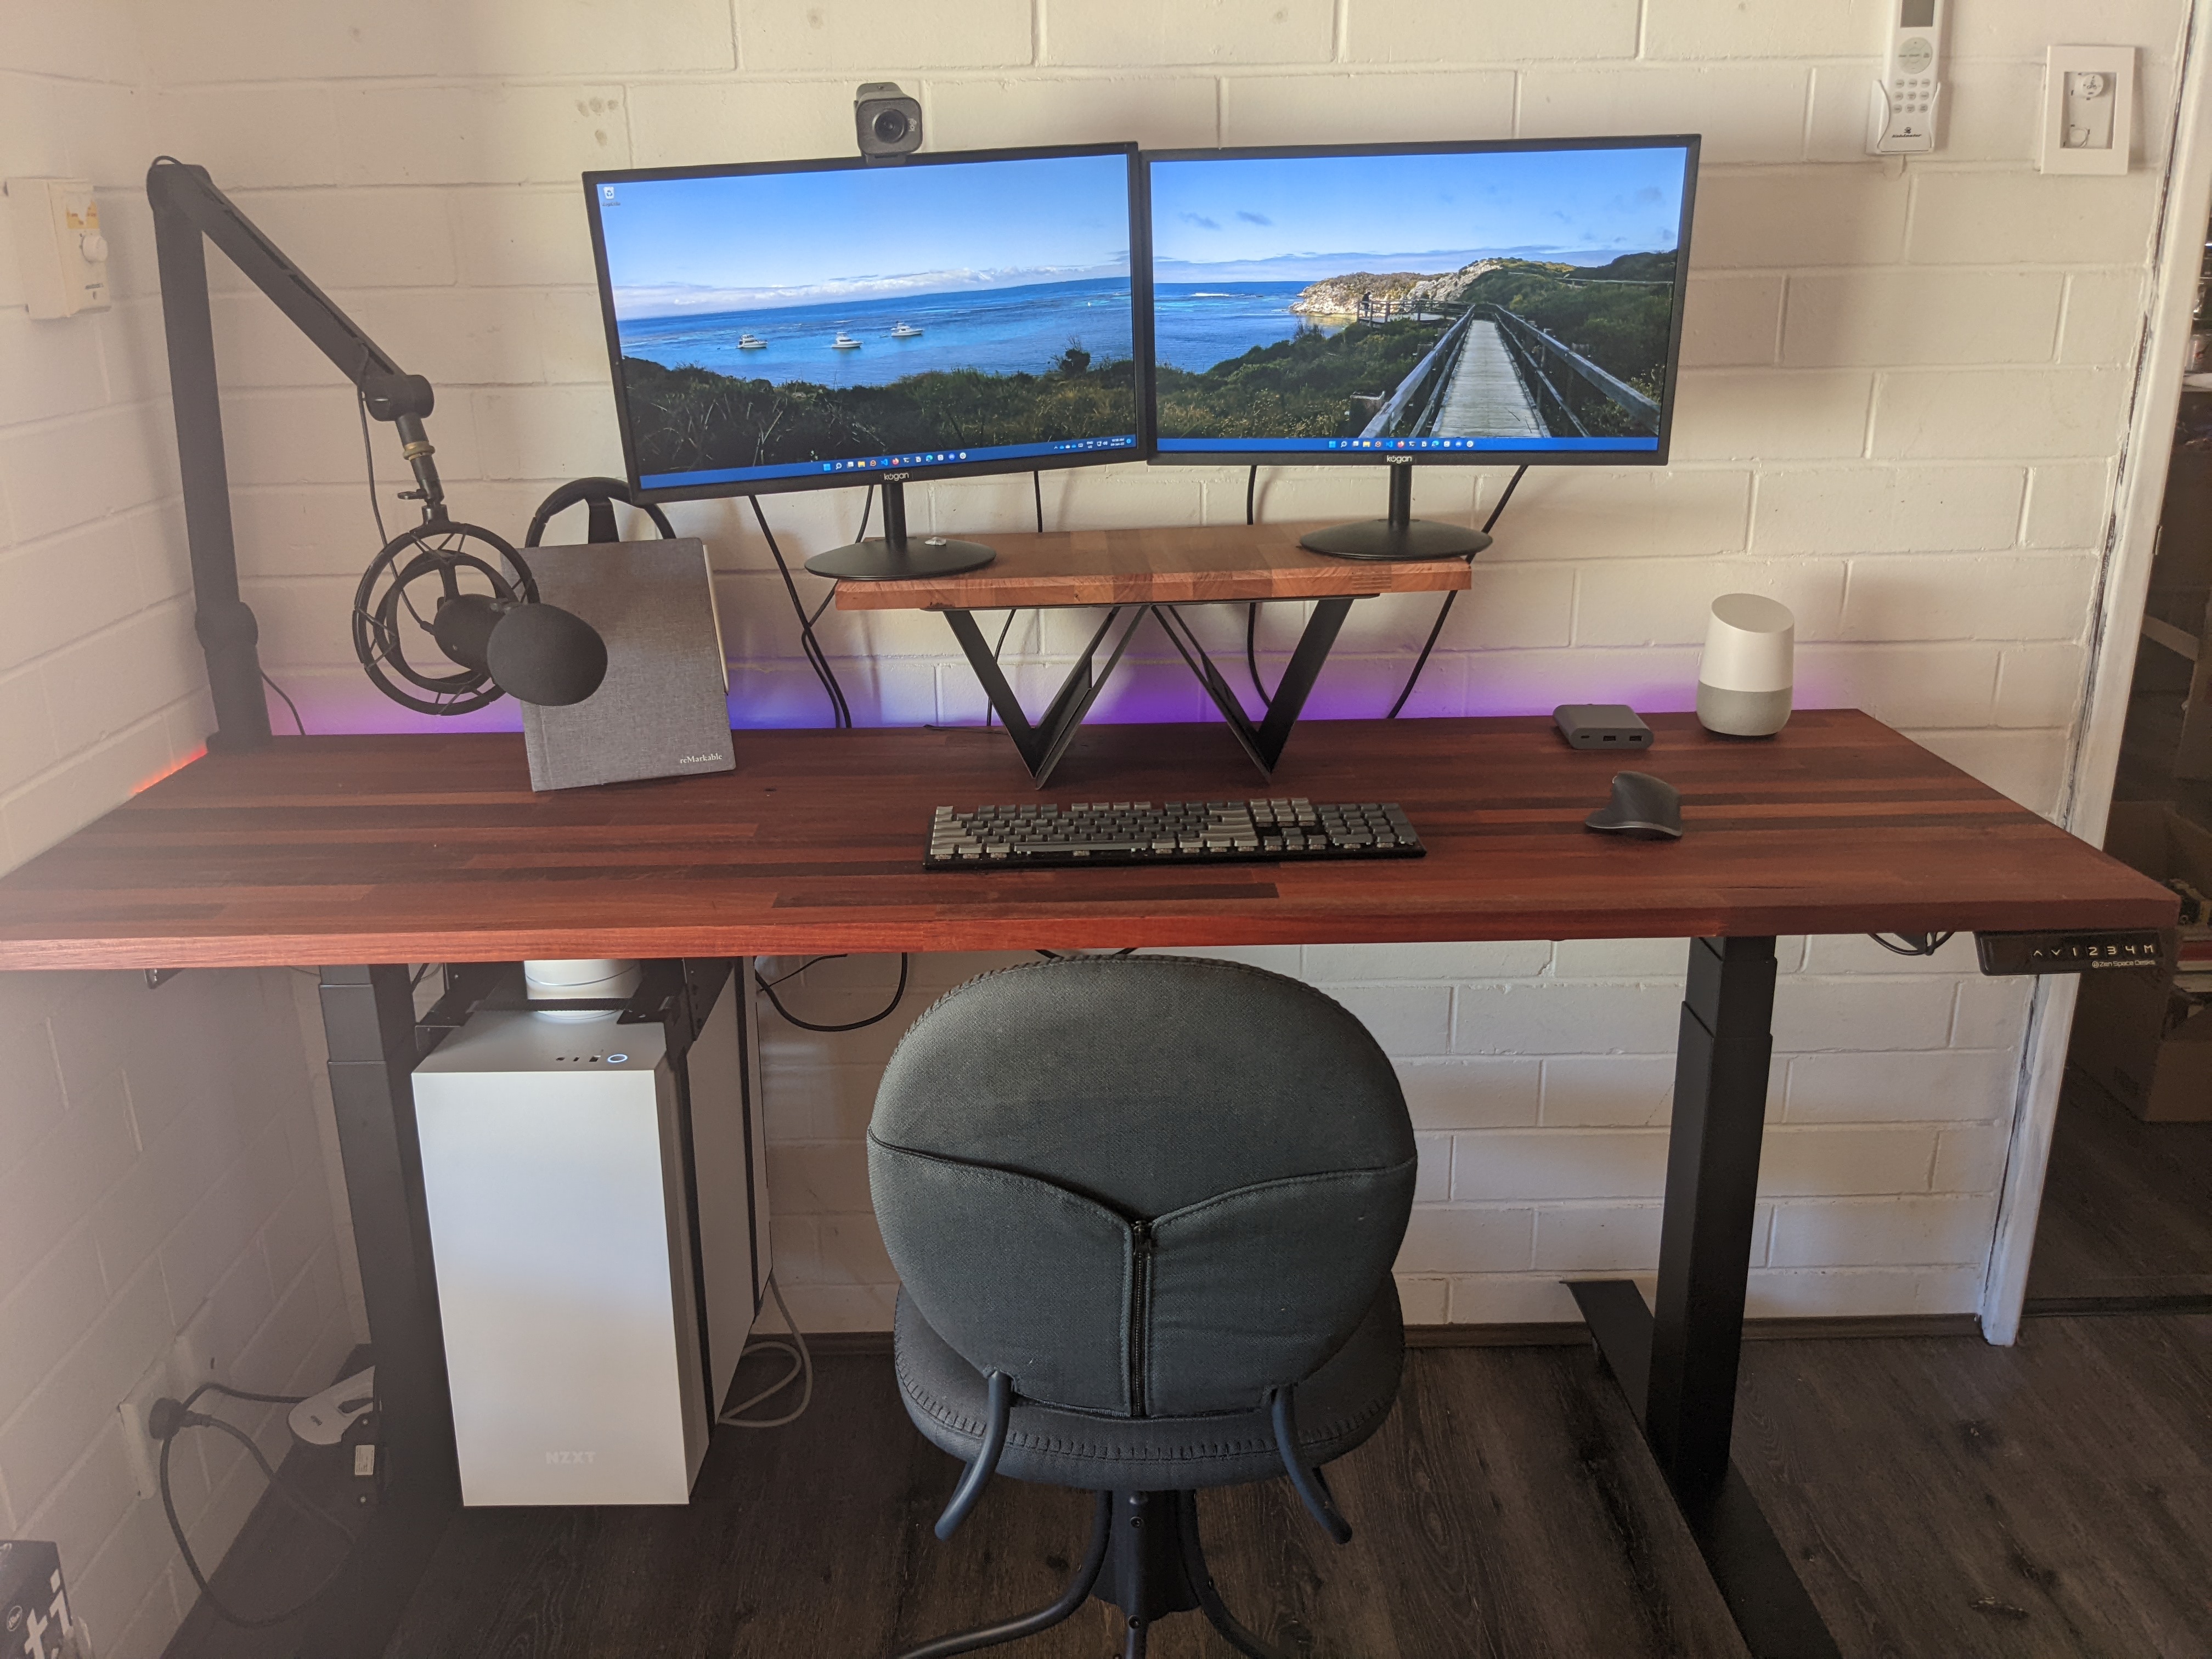
Most of the rest of my setup I already had, my keyboard and mouse I upgraded and was specifically looking for something that was rechargeable (why does everything just take batteries, there’s literally a charging port right there!) and bluetooth connectivity. I was less fussed on shiny lights but for the keyboard figured the $20 extra to get RGB lights wasn’t going to make much of a difference.
- Keychron K1 108 key keyboard (now only available in smaller versions)
- Logitech MX Master 3 Mouse
I upgraded my camera and mic setup last year when recording my online course, although I ended up finding the boom arm and shock mount on Facebook Marketplace.
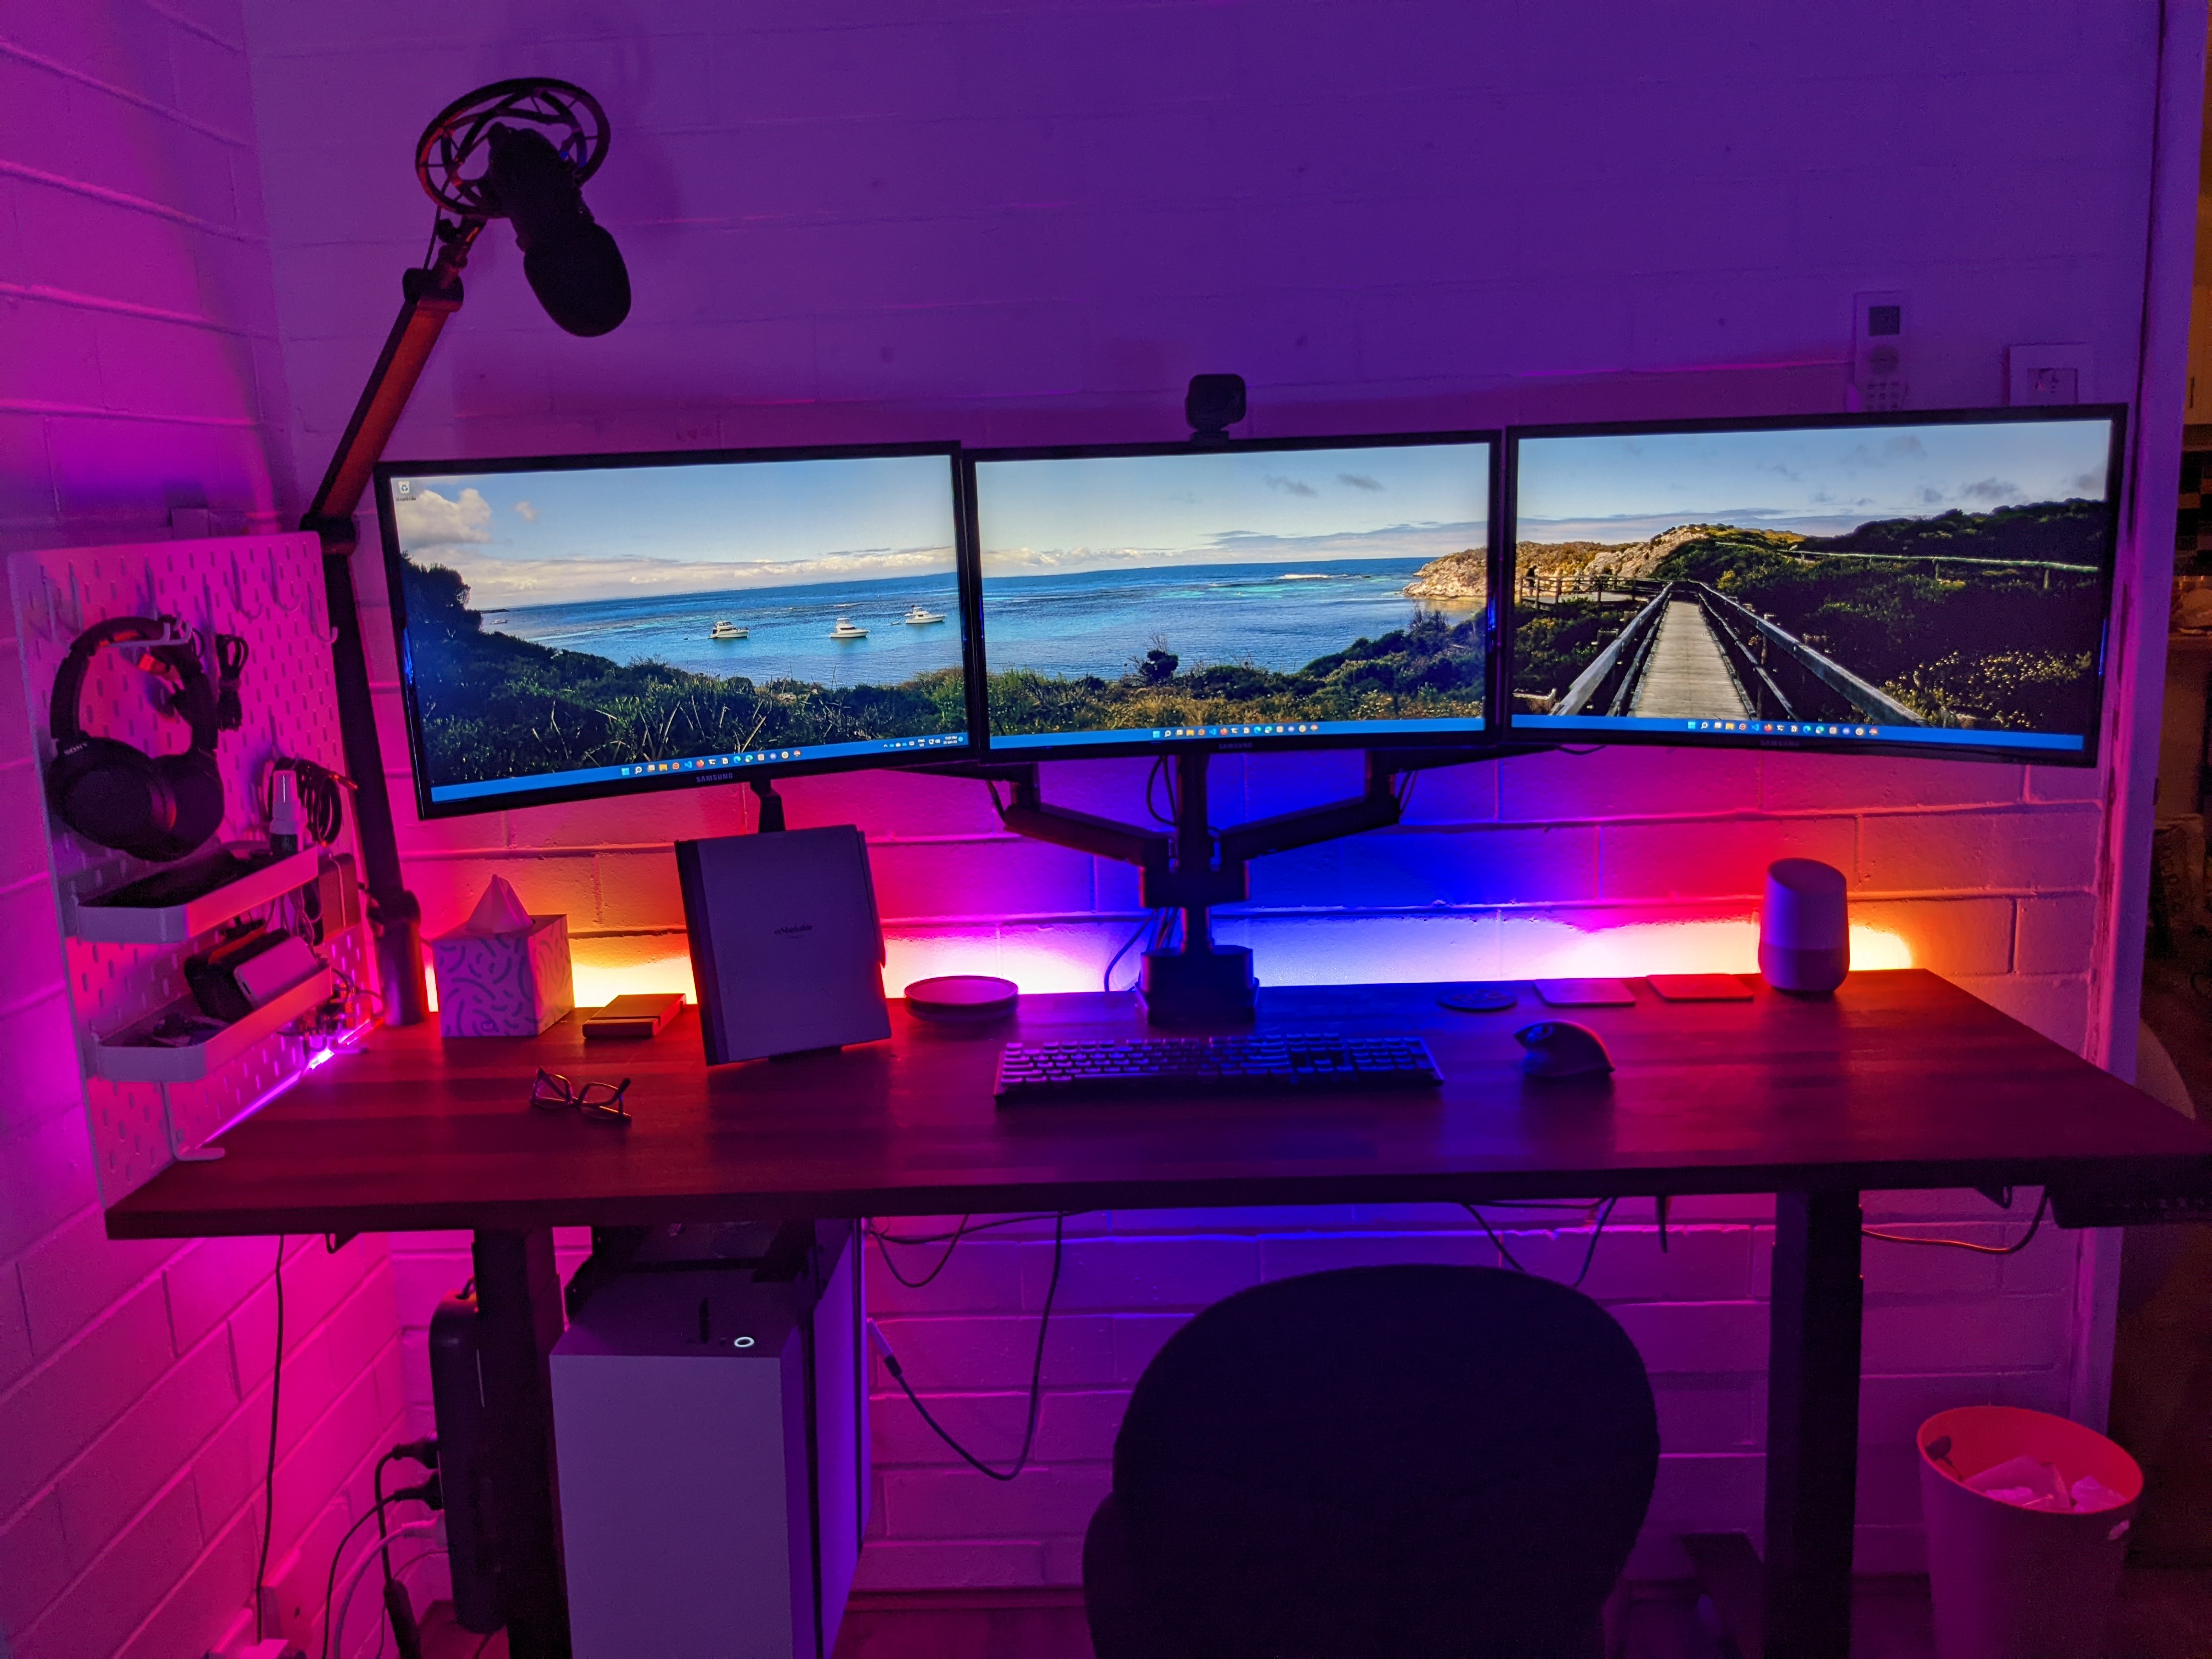
Although I only had two monitors, I managed to track down a triple monitor arm that allowed me to attach it through the desk rather than clamping onto the back, with the Brateck Triple Monitor Mount, which meant that I wouldn’t have to buy another monitor arm when I went back to a triple screen setup, even if my screens were weirdly high for the time being.
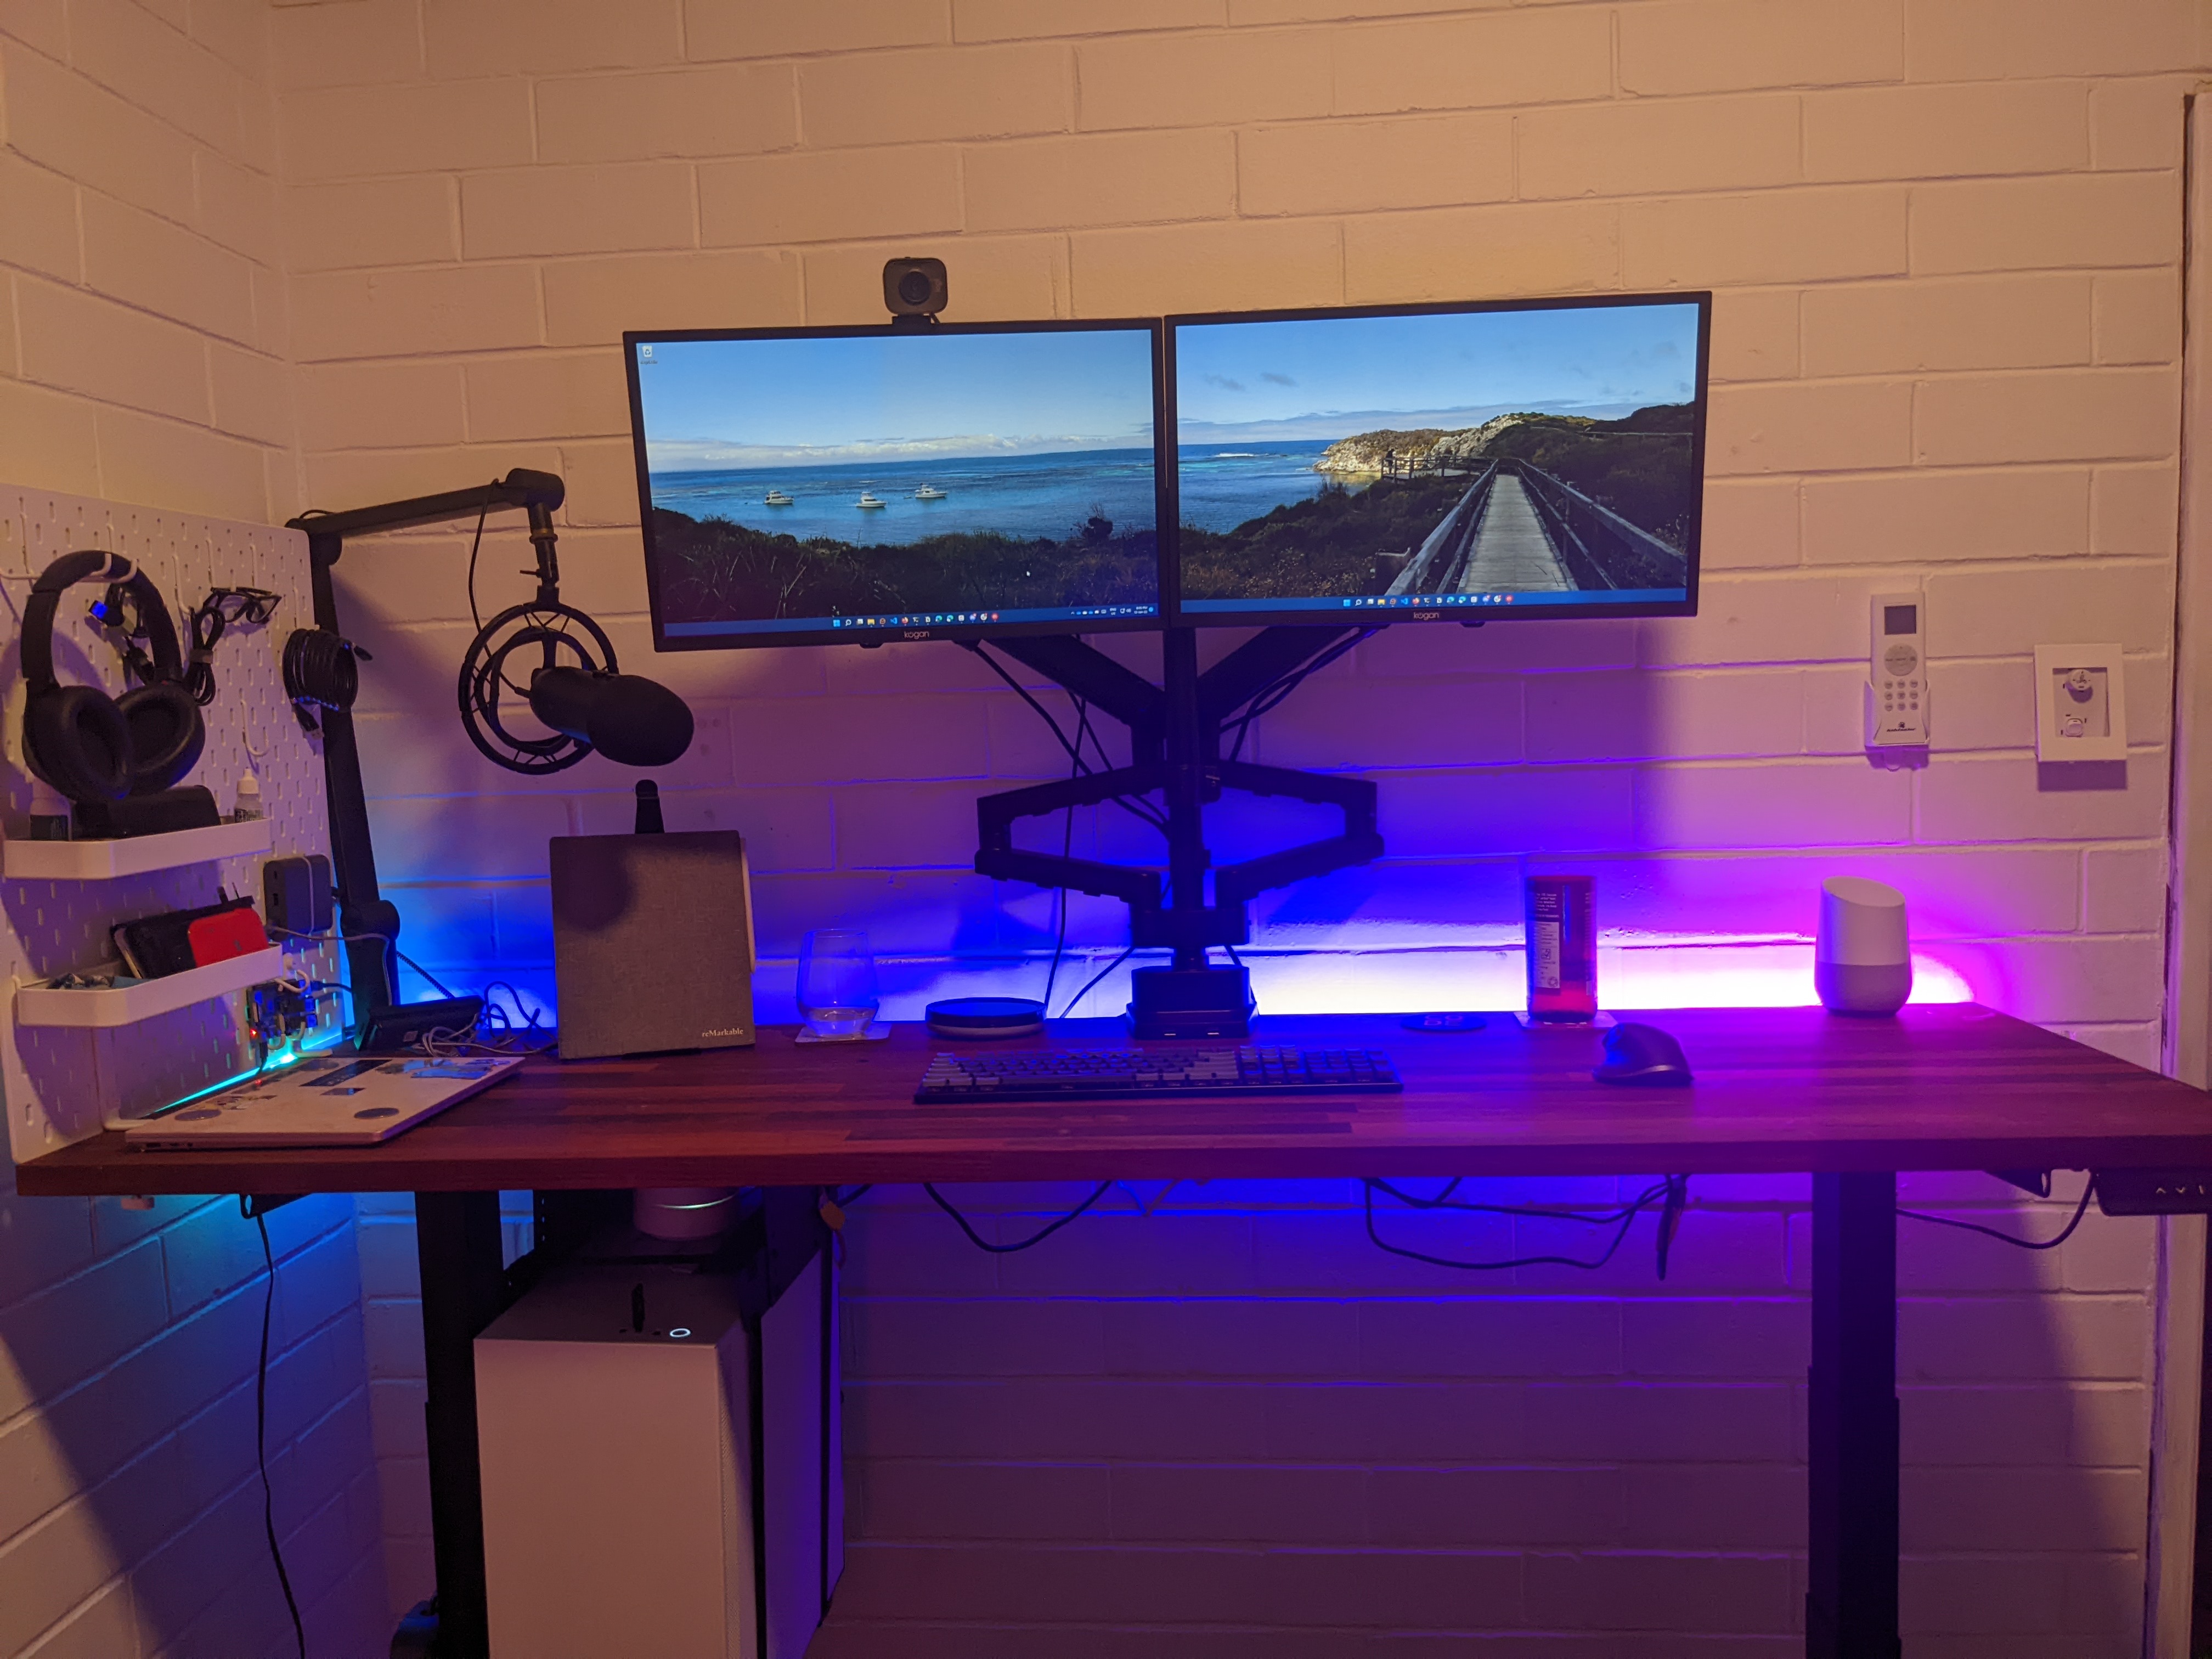
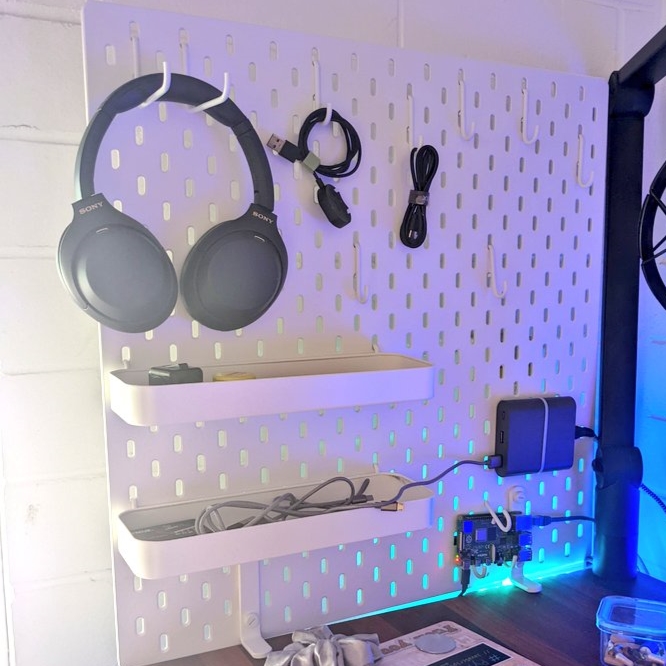
I also got a pegboard from IKEA that allowed me to store and organise things so they didn’t clutter up my desk, which also came with clamps so that instead of mounting it to the wall, it could attach to the desk and move up and down when the desk did.
The Monitors
I had been planning on waiting to get a graphics card and upgrade my monitors to a three monitor setup, however there was an unmissable special at JB HiFi which mean that I could get Samsung curved monitors for less than regular ones, and I managed to find a USB-HDMI adaptor, which although it is temperamental and not great, is a good workaround until I get a graphics card to use instead.
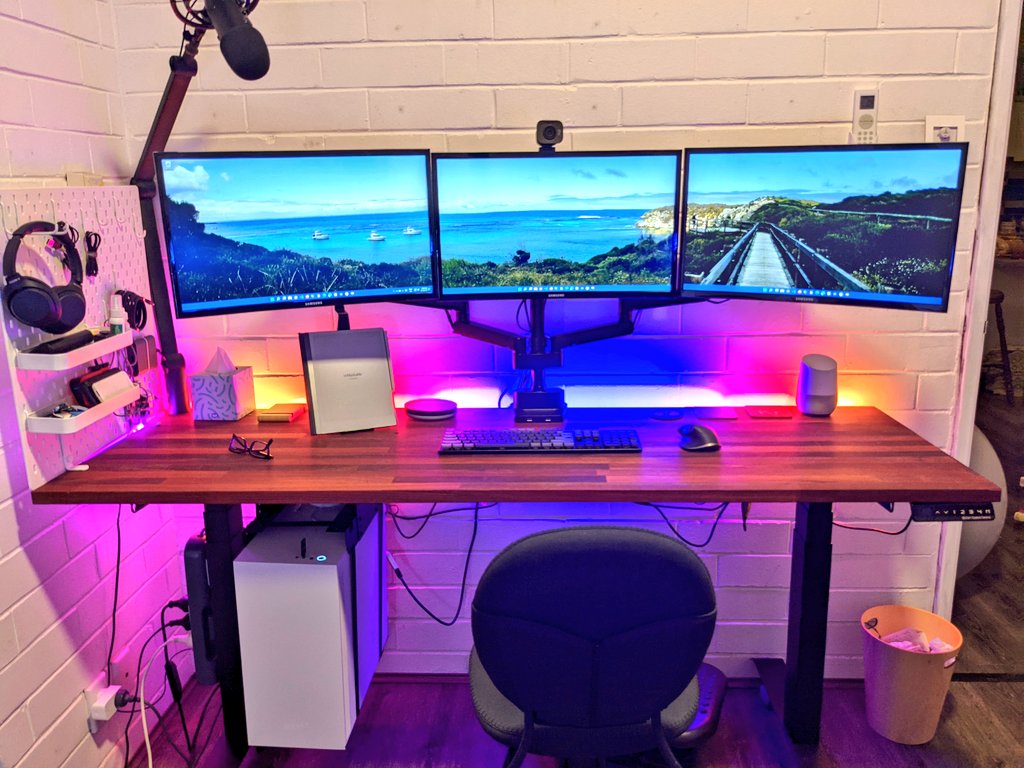
The Finished Product
A developer’s desk is never really done, and there’s already fair few changes coming, including a new chair, and a graphics card, but for now my desk is completed.
Bonus Setup
Although my desk is where I spend a lot of time, behind me in my office is also important as it’s visible any time I have a video call or record a video (and yes I know there are virtual backgrounds, but I prefer to just have a nice background, it’s compatible on all platforms!
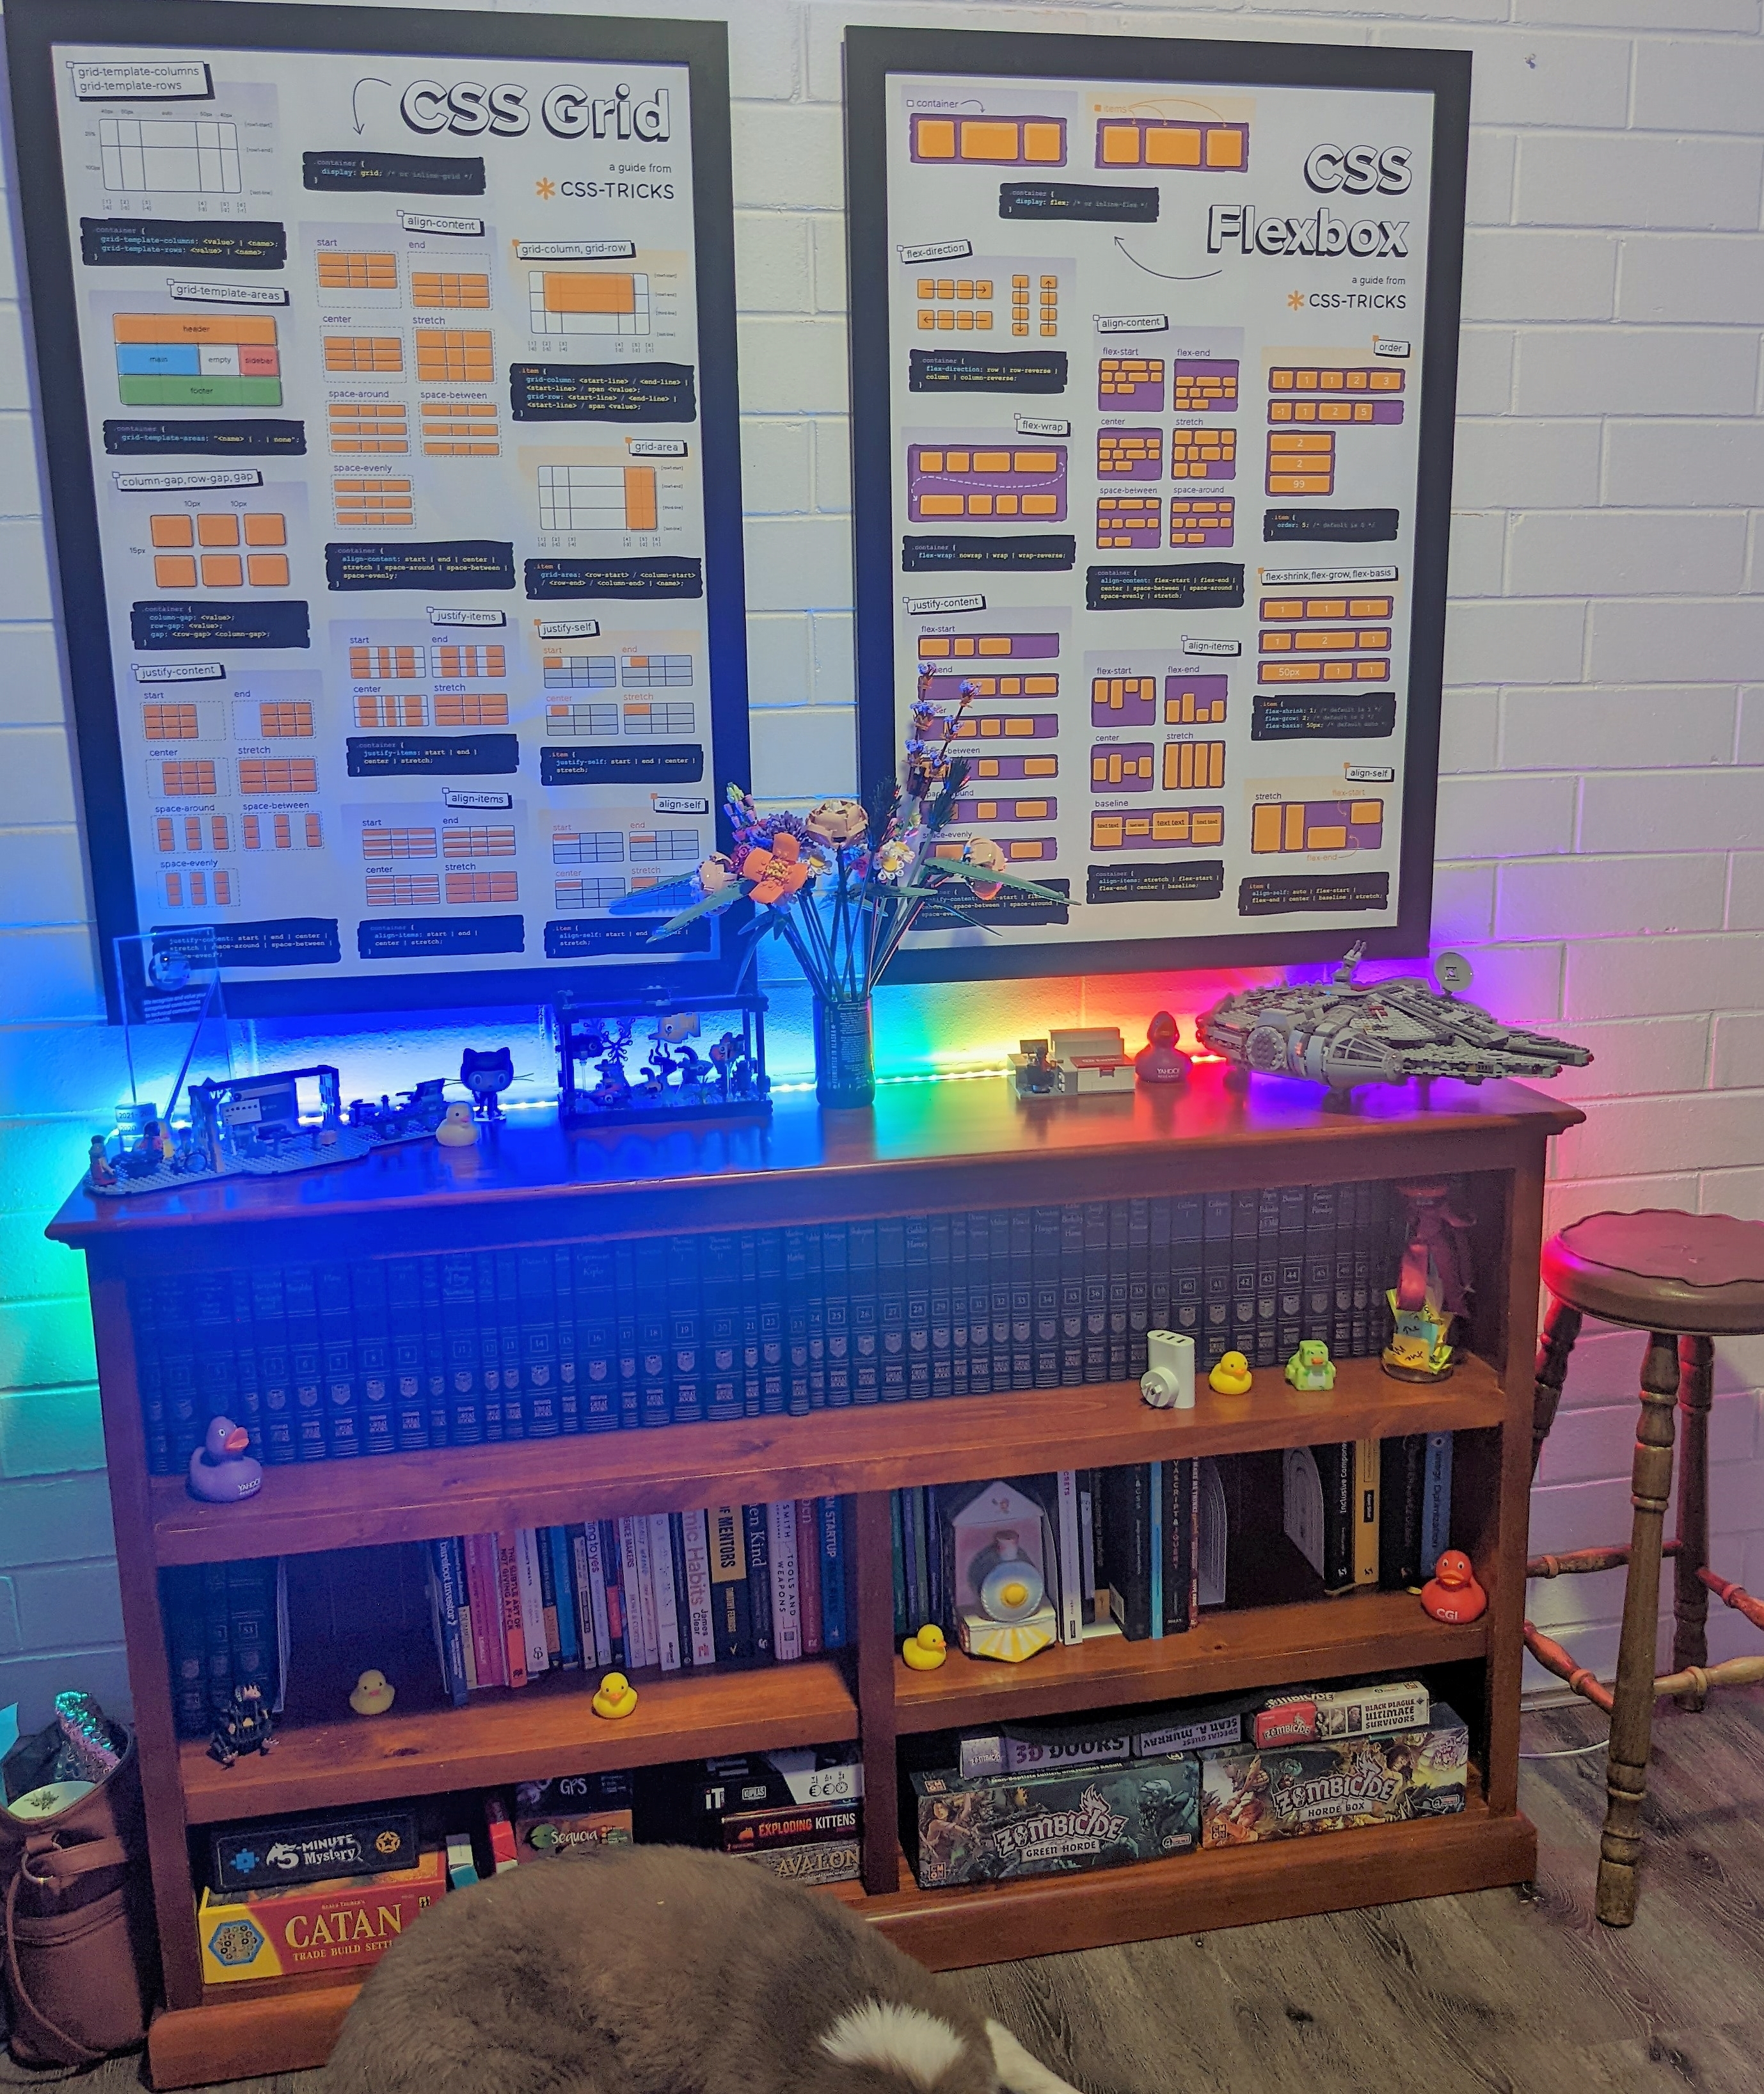
Behind me at my desk I have the CSS Tricks Guide to Flexbox and Guide to CSS Grid posters, which are also surprisingly useful when I want to double check which property I want or how something works. This is also where I can keep my tech books, some of my favourite board games, showcase my MVP award (although I may have to move that because the lights make it invisible) and some of my Lego. When I got the LIFX lightstrip for my desk, I got an extra one to put behind me as well (and will be getting additional strips to light underneath the shelves).
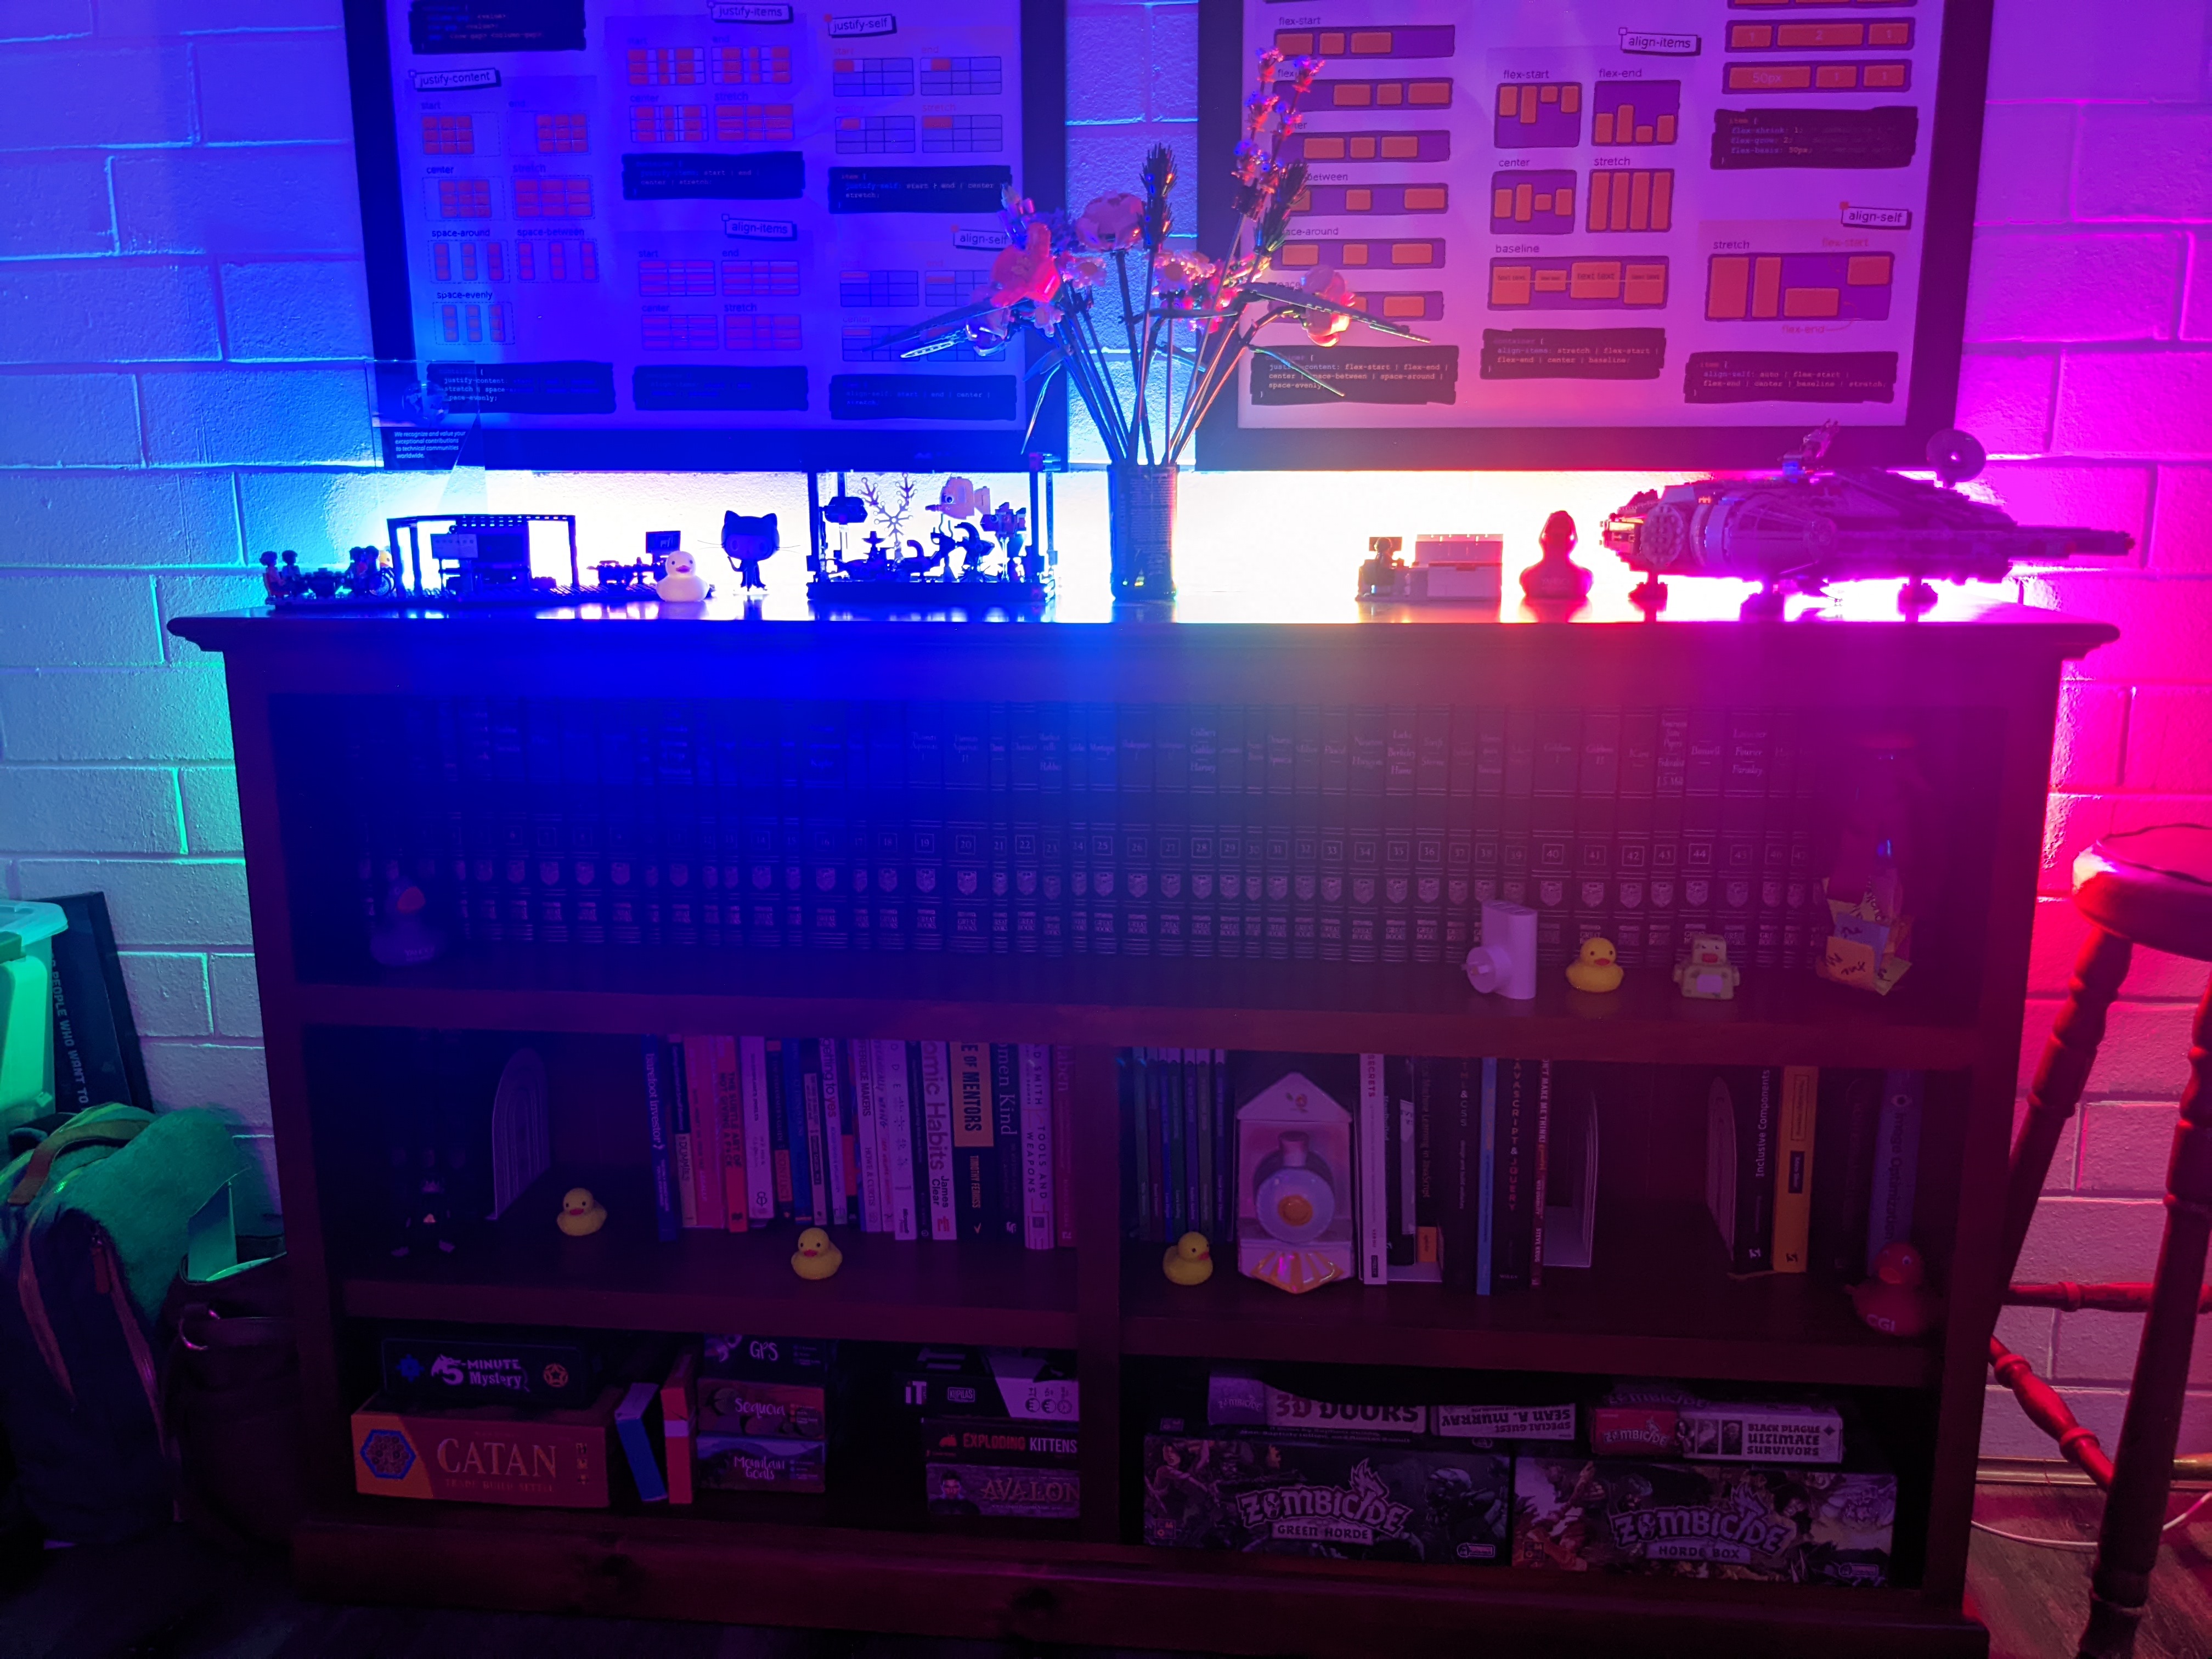
This is also where I like to hide various easter eggs, so that everyone spots something different every time I have a video call with them, there’s always something new to find.
Extra Bonus
As I said, the offcut from the end of my desk turned out to be a great grazing platter, and the perfect size for when having a large gathering of people. I also gave it a coat of tung oil (I have the food grade one, I use it on our chopping boards as well to keep them going longer), and it was just the right size for our housewarming.
